- Health Conditions A-Z
- Health & Wellness
- Nutrition
- Fitness
- Health News
- Ayurveda
- Videos
- Medicine A-Z
- Parenting
- Web Stories
3-Day Kettlebell Workout Routine For Beginners

Full Body Kettlebell Workout Plan (Credit: Canva)
Starting a new fitness routine can be both exciting and overwhelming for beginners. This structured program simplifies your journey with two key elements: a full-body workout that maximizes efficiency and calorie burning, and the convenience of using just one piece of equipment—a kettlebell. The appeal of kettlebell training lies in its practicality. Unlike bulky gym equipment, kettlebells are compact and easy to store.
Whether you’re working out at home, in a small apartment, or traveling, a single kettlebell can serve as your entire gym. This ease of use makes it an excellent choice for those who face space constraints or enjoy the convenience of home workouts.
Moreover, the unique design of the kettlebell facilitates functional training. Its shape and the nature of typical kettlebell exercises promote a natural range of motion, engaging multiple muscle groups simultaneously. This functional aspect makes kettlebell workouts highly effective for improving overall strength, balance, and coordination.
Kettlebell training also fosters explosiveness, which can be beneficial for advanced Olympic movements, though our focus here will be on foundational exercises. With the right approach, kettlebells can enhance your power, endurance, and muscle definition.
3-Day Full Body Kettlebell Workout Plan
Ready to dive in? Here’s a three-day full-body kettlebell workout plan designed for beginners, aimed at establishing a routine and boosting your fitness levels. Each workout targets different movement patterns to ensure comprehensive training.
Day 1
Kettlebell Swings - 3 sets of 12 reps
Goblet Squats - 3 sets of 15 reps
Kettlebell Rows - 3 sets of 10 reps per arm
Kettlebell Presses - 3 sets of 12 reps
Russian Twists - 3 sets of 20 reps
Day 2
Kettlebell Deadlifts - 3 sets of 12 reps
Kettlebell Lunges - 3 sets of 10 reps per leg
Kettlebell Cleans - 3 sets of 12 reps
Kettlebell Overhead Presses - 3 sets of 10 reps
Kettlebell Windmills - 3 sets of 8 reps per side
Day 3
Kettlebell High Pulls - 3 sets of 15 reps
Kettlebell Sumo Squats - 3 sets of 12 reps
Kettlebell Snatches - 3 sets of 10 reps per arm
Kettlebell Front Squats - 3 sets of 15 reps
Kettlebell Figure 8s - 3 sets of 20 reps
Each exercise should be performed in a straight-set fashion, completing all sets of one exercise before moving on to the next. Rest for about 30 seconds between sets. As you progress, aim to reduce rest periods and increase intensity. If you have multiple kettlebells, choose a weight that challenges you but allows you to complete each set with 2-3 reps left in the tank.
Things to Keep In Mind During Workout
Selection: Start with a weight that suits your fitness level. If you’re new to kettlebell training, begin with a lighter weight to master the techniques before advancing to heavier options. The recommended weight should bring you to an RPE (Rate of Perceived Exertion) of 6, meaning you should be working at about 75% of your maximum effort.
Duration: The recommended duration for this program is four weeks, but you can extend it as needed. Consider upgrading to a heavier kettlebell or varying your routines every four weeks to continue challenging your body and prevent plateaus.
Kettlebell training offers a dynamic and efficient way to achieve full-body fitness. Its compact nature, functional benefits, and versatility make it an ideal choice for anyone looking to maximize their workout potential. Whether you’re a beginner or looking to refine your routine, incorporating kettlebells into your fitness plan can lead to significant improvements in strength, endurance, and overall health.
Disclaimer: This article is for informational purposes only and does not replace professional advice tailored to your individual health needs. Consult a fitness expert before starting any new workout routine.
Do Weighted Vests Really Help With Weight Loss And Bone Health? Research Shows Mixed Results

(Credit-Canva)
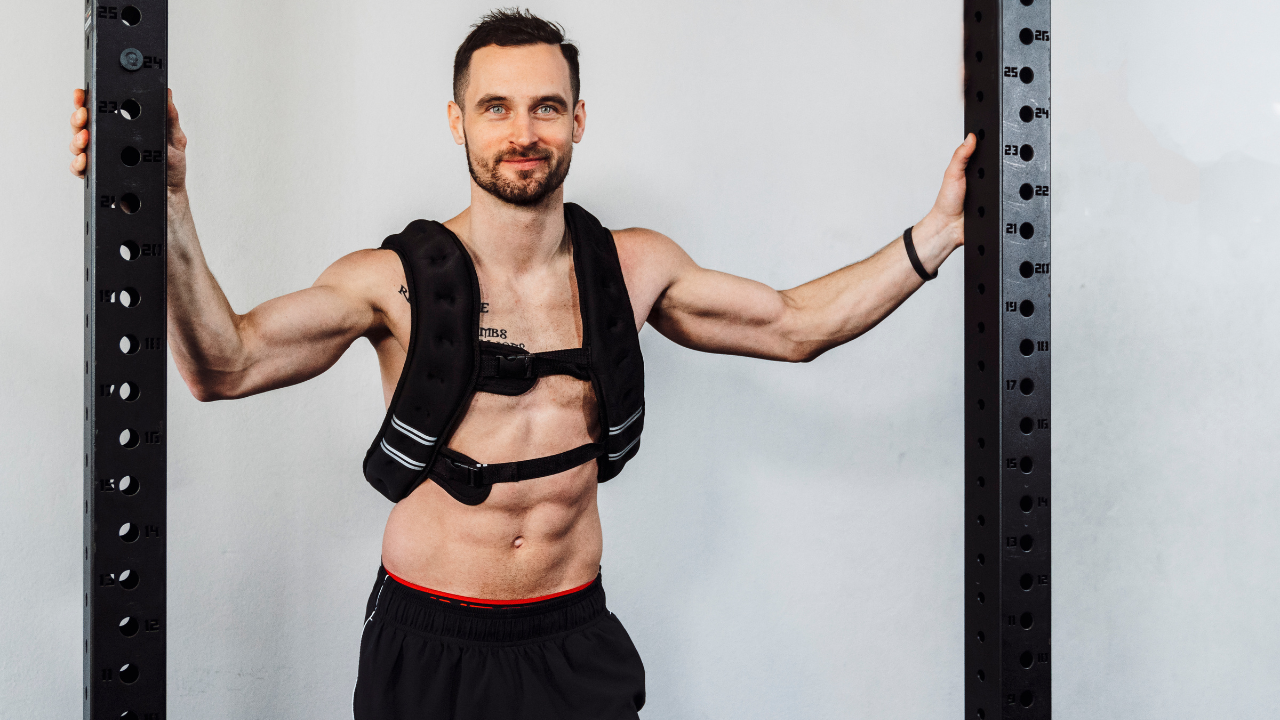
Weighted vests have become a huge trend in the fitness world. You see celebrities wearing them, and they are all over social media. Many people wear them hoping to lose weight, build muscle, and even improve their bone strength, as what’s better than making these activities more of a challenge. These vests are especially popular with older women who want to protect their bones, which can become weaker after menopause.
But does science actually support all the social media hype? The answer is a bit complicated. The benefits might not be as clear-cut as a marketing suggests, and a new study is adding to the discussion.
Do Weighted Vests Improve Bone Health?
The evidence on this is mixed. A recent study, published in the journal JAMA Network Open, looked at 150 obese adults. The researchers had one group wear a weighted vest for seven hours a day for a whole year. The result? The vests did not reduce the amount of bone loss in their hips.
This finding was a surprise to many, especially since earlier research seemed to show the opposite. In fact, studies from the 1990s and 2000s suggested that weighted vests could help increase bone density and lower the risk of falls. More recently, a 2013 study found that postmenopausal women who exercised in a weighted vest for six weeks saw an increase in their bone density. Similarly, a 2015 study found that weighted vests helped postmenopausal women strengthen their leg muscles and improve bone density in their thigh bone.
One possible reason for the different results is the way the studies were done. In the newer study, participants started with very light vests, which may not have been enough to stimulate bone growth. Experts agree that more research is needed to fully understand the effects of weighted vests on bone health.

Can Weighted Vests Help with Weight Loss?
Research on whether weighted vests help with weight loss is limited, but some studies show a potential link. Still, other research points to a potential link. For example, a 2020 study found that people who wore a heavier weighted vest for eight hours a day over three weeks lost more body fat than those who wore a lighter vest. Another small study from 2025 suggested that wearing a weighted vest along with a calorie-restricted diet could help people avoid gaining back weight they had lost.
In the Wake Forest study, participants who wore weighted vests did lose about 10% of their body weight, but so did the other groups in the study who did not wear vests, suggesting the weight loss was likely from calorie cutting.
While the evidence isn't conclusive, it seems that weighted vests might be a helpful tool for some people on their weight loss journey, but they are not a magic solution on their own.
Should You Wear a Weighted Vest?
The science is still developing, but weighted vests may be a useful tool for some people. Experts say they could be particularly beneficial for postmenopausal women and anyone looking to make their resistance workouts more challenging.
If you decide to try a weighted vest, it's a good idea to keep the weight at or below 10% of your body weight. Always listen to your body and adjust your workout as needed.
Is Lifting Weights Everyday A Smart Workout Routine? We Weigh The Pros And Cons

Credits: Health and me
When one imagines becoming fit, weightlifting is usually the first to come to mind. It guarantees muscle development, a gain in strength, and a lean body. However, here's the catch—though strength training is not negotiable, determining the frequency is a different story altogether. Some gym-goers insist on a daily lift, while others caution it may do more harm than good.
Strength training has moved from mainstream to mass, and with that comes a new controversy: Should you lift every day? For some, daily resistance training is the shortcut to improvement. For others, it's a red flag about getting injured, overtraining, and burnout. To get clear, let's cut through what science has to say about the pros, the cons, and the balance between consistency and recovery.
Weight lifting isn't all about "chiselling" muscle. It's one of the best ways to exercise for long-term health. Two sessions of resistance training per week, at least, is suggested by the American College of Sports Medicine (ACSM), but fewer than 20% of American women reach that goal. This shortfall is important because resistance training accomplishes more than the development of strength it affects every system in the body.
The science isn't one-size-fits-all, either. Your recovery capacity, workout intensity, age, and even sleep habits can determine whether daily lifting assists or hinders you. What may work for an advanced lifter could blow up a beginner.
So before we take apart the effects on body composition and weight control, it's a fair question: Does weightlifting every day optimize gains—or does it burn you out?
Body Composition and Weight Control
Perhaps the largest benefit of weight training is its impact on body composition. The more muscle, the higher your resting metabolic rate; your body burns more calories even at rest. Science demonstrates resistance training is lowering visceral fat and preserving lean mass, both of which are protective of chronic disease. Unlike fad diets, these are sustainable.
Muscle and Strength Gains
It may seem glib, but lifting weights actually makes you stronger—and that strength is not just gym pride. It carries over into daily life, from lugging groceries to keeping up with the kids. Keeping muscle also becomes more critical as we get older. Without ongoing strength training, adults can lose 3–8% of muscle mass every decade after age 30, which makes lifting one of the most useful weapons against healthy aging.
Metabolic and Bone Health
Stronger muscles equal better metabolic health. Lifting weights improves insulin sensitivity and helps regulate blood sugar, reducing the risk of type 2 diabetes. For bones, the evidence is equally compelling. A decade-long study in Journal of Bone and Mineral Research Plus showed older adults who maintained resistance training not only preserved but actually improved bone strength, protecting against osteoporosis and fractures.
Brain and Mental Health
Mind-body connection exists. Endorphins are increased, anxiety reduced, and cognitive abilities such as memory and concentration improved with strength training. It even reduces risk of depression, studies indicate. Lifting weights is hence a potent tool for mental health as well, in addition to its physical benefits.
Is Lifting Weights Every Day Too Much?
That's where the argument gets fascinating. Consistency in exercise is important, but with weight training, recovery and rest come into the picture. Muscles build and adapt in resting periods, not during lifting alone.
Training the same muscle groups every day, particularly with high intensity, can boomerang. Overtraining will result in:
- Chronic soreness and muscle fatigue
- Higher risk of injuries
- Insomnia and mood swings
- Impaired immune function
In women, it might even lead to menstruation irregularities. In athletes, it usually leads to plateaued or worsened performance.
Why Is Recovery Part For Progress?
Rest isn't loafing—it's planning. Ligaments, tendons, and joints require time to recover, just like muscles. Avoiding rest days puts you at greater risk of overuse injuries that can take weeks or months to recover from. The sweet spot, in the opinion of the CDC and World Health Organization, is a minimum of two strength-training sessions per week, with recovery or light activity days in between.
When Daily Weight Training Can Work?
All "every day" routines aren't created equal. So long as intensity and volume are handled intelligently, daily sessions can be safe and even favorable.
Lighter Days Matter
Rather than seven consecutive heavy sessions, most lifters employ "active recovery" days. That might be resistance band exercises, bodyweight mobility drills, or stability training for the core. These still engage muscles but not to the point of debilitating them.
Another plan is programming. A split like a bodybuilder's—one day upper, one day lower—provides individual muscles more recovery while making the routine daily. But without proper planning, the cumulative fatigue is still there.
Who Should Be Careful?
Although strength training is safe for the majority, there are some groups for whom medical clearance is necessary prior to beginning: those with heart disease, joint problems, or who are pregnant. Older adults might be better off using weight machines than free weights if balance is an issue. It's invaluable for newbies to hire a trainer to learn proper form.
Tips If You Want to Lift Daily
If you find yourself drawn to the possibility of lifting every day, remember these guidelines:
Begin light and progress gradually: Start with bodyweight exercises such as squats or push-ups before adding weight.
Form comes first: Faultless technique avoids injury and guarantees gains.
Schedule recovery: Incorporate mobility work, stretching, and lower resistance training sessions to offset intense training.
Pay attention to your body: Fatigue, pain, and irritability are indicators you require more rest.
Lifting weights is probably the best thing you can do for your health, but more isn't necessarily better. For most of us, two to four sessions a week strike the optimal balance between strength gains, metabolic benefits, and prevention of injury. If you're dead set on lifting every day, mix up the intensity, include active recovery time, and don't train identical muscle groups consecutively.
Everyday activity is a wonderful goal—but weightlifting seven days a week is not a requirement for it. Balance, not excess, is the key to lasting improvement.
Disclaimer: The information contained in this article is for informational purposes only and should not be construed as medical advice. Consult with a health provider before initiating or altering your exercise routine.
A Simple 10-Minute Daily Habit Can Boost Sleep Quality

Credits: Canva
Public health advice has usually centered on how much sleep we get. Eight hours has long been the magic number, but researchers are now uncovering that how well you sleep matters just as much — maybe even more. Deep, restorative sleep is the body’s prime time for repairing tissue, consolidating memories, and balancing mood-regulating hormones. And as it turns out, a surprisingly simple daily habit can help you get more of it.
A new study from The University of Texas at Austin, published in the Journal of Physical Activity & Health, followed students over several months using wearable devices like Fitbits. Instead of just counting total exercise minutes, the research team zoomed in on how often people moved.
The big reveal? Those who exercised regularly even for just 10 minutes a day enjoyed deeper, more restorative non-REM sleep, the stage most critical for brain and body recovery. “Frequency does seem to matter,” said Benjamin Baird, a research assistant professor of psychology and one of the study’s lead authors.
Why 10 Minutes Is Enough?
Moderate to vigorous activity — think brisk walking, cycling, or any movement that quickens your breath while still allowing conversation — for as little as 10 minutes daily had measurable benefits. This wasn’t about logging intense workouts or breaking personal records. Even light, consistent movement like short walks or standing breaks improved sleep quality and next-day mood.
According to Chris Corral, co-lead of the study, “You don’t need to run marathons. Just moving a little each day helps. Light activity counts too. Doing something is better than doing nothing.”
Participants who moved daily didn’t just sleep better — they woke up feeling more energized and reported lower stress levels. This connection between non-REM sleep and mood has been observed before, but most earlier studies only looked at short-term effects in controlled lab settings.
What made this study different was its real-world design. By tracking people’s habits continuously for months, researchers could see the cumulative benefits of consistent movement on sleep and emotional well-being.
How We Measure “Enough” Exercise?
Current guidelines from the Centers for Disease Control and Prevention (CDC) and World Health Organization (WHO) recommend 150 minutes of moderate activity per week. But they don’t specify how to spread it out. That gap matters.
“If you pack all that activity into the weekend, you might miss out on the sleep benefits of moving daily,” Corral explained. The UT findings hint that public health advice may need updating — shifting the focus from total minutes to frequency.
How Sleep Quality Shapes Overall Health?
Deep sleep isn’t just about feeling rested. It’s when the brain clears waste proteins linked to neurodegenerative diseases like Alzheimer’s. It’s also when muscles repair, immune cells strengthen, and the nervous system resets. Poor-quality sleep, on the other hand, is tied to higher risks of heart disease, diabetes, depression, and even shortened lifespan.
In other words, this isn’t just about feeling less groggy — it’s about long-term brain and body health.
The study’s use of wearable trackers like Fitbits allowed researchers to capture a detailed picture of both movement and sleep in real life — not just in the artificial environment of a lab. This is part of the Whole Communities—Whole Health initiative, an interdisciplinary project aiming to understand how everyday habits affect overall well-being.
Next, researchers plan to see if these findings hold true in more diverse populations, including older adults and people with chronic health conditions.
Why Better Sleep Is Essential for Everyday Wellness?
Move daily, even briefly — A brisk walk after dinner, stretching breaks at your desk, or climbing stairs instead of taking the elevator all count.
Consistency beats intensity — Doing a little bit every day trumps exhausting yourself a few times a week.
Pair movement with good sleep hygiene — Keep a consistent bedtime, limit screen exposure before bed, and create a cool, dark sleeping environment for maximum benefit.
Better sleep doesn’t require an overhaul of your schedule or a gym membership. Just 10 minutes of daily movement can make a tangible difference in how deeply and restoratively you sleep.
Sleep is the foundation for energy, focus, emotional resilience, and long-term health. And unlike expensive treatments or complicated regimens, this fix is free, simple, and accessible to almost everyone.
As Baird put it, “Current guidelines don’t reflect the importance of frequency for sleep health. Having this kind of data allows us to start thinking about whether they should.” So if you want to sleep deeper, feel sharper, and start your days with more energy, the solution might be as simple as lacing up your shoes and moving every single day.
© 2024 Bennett, Coleman & Company Limited

