- Health Conditions A-Z
- Health & Wellness
- Nutrition
- Fitness
- Health News
- Ayurveda
- Videos
- Medicine A-Z
- Parenting
Men's Health: 12 Shoulder Exercises To Get That Coveted V Shaped Body

Shoulder Exercises (Credit: Canva)
Those shoulders are important! No matter how many crunches you do or lose inches from your waist, you will never be able to get that perfect V-shaped body until you don't make your shoulders bigger and stronger. In this article, we bring you the best shoulder exercise that can help you build up strong shoulders. But before that, you must note that your shoulder is made up of two groups of muscles: Extrinsic muscles, which originate from the torso and attach to the bones of the shoulder and intrinsic muscles, which originate from the scapula and/or clavicle and attach to the humerus.
Barbell Standing Press
Grab a barbell and hold it at shoulder height with palms facing forwards. Set your feet shoulder-width apart and slightly bend your knees to initiate the move. Push up with your legs to explosively press the barbell straight above your head. Return under control to the start position.
Seated Dumbbell Press
To perform this, sit on the bench holding two dumbbells at shoulder height with an overhand grip. Press the weights up above your head until your arms are fully extended. Return slowly to the start position.
Arnold Press
With a rotating motion at the end, this exercise hits more than the standard press to fill out that V-shape.Sit on a bench with dumbbells held in front of you, palms facing your shoulders as though you've just finished a bicep curl. Push the dumbbells up over your head while rotating your arms until your palms face away from you. Straighten your arms, pause, then reverse the movement.
Lateral Raise
The slower you can perform these raises, the more they'll hurt – and the better you're going to look. Grab a couple of dumbbells and stand with them by your sides, with your palms facing your body. Stand tall with your core switched on and shoulder blades pulled back and down. Keeping your back straight, and your upper body still. Lift the dumbbells out to your side with a slight bend at your elbows, keeping the weights higher than your forearms. Lift until your arms are parallel to the floor then slowly lower to the start position.
Half-kneeling Archer Row
While kneeling with only your left knee on the ground. grasp a light resistance band in both hands and engage your glutes and abs. Straighten your right arm and look at it. Tighten your back muscles and keep your right arm straight. Bring your left hand close to your right elbow. Pull the band apart with your right hand, as if pulling a bow, squeezing your back and shoulder muscles and bending your elbow as you do this.
Bent-Over Reverse Fly
Grab a pair of dumbbells and bend forward at your hips until your torso is nearly parallel to the floor. Set your feet shoulder-width apart. Let the dumbbells hang straight down from your shoulders, your palms facing each other, with your arms slightly bent. Keeping your back flat and your torso sill, raise your arms straight out to your sides until they’re in line with your body. Don't change the bend in your elbows. Pause, then slowly return to the starting position.
Upright Row
Hold a dumbbell in each hand, resting in front of your thigh. Lift the dumbbells vertically until they're in line with your collarbone, with your elbow pointing towards the ceiling. Lower the dumbbell back down and repeat.
Incline Bench Combo L-to-Lateral Raise
Holding light dumbbells at your sides, lie facedown on an incline bench set to a 45-degree angle. Tighten your core, glutes, and shoulder blades. Raise both arms out to the sides explosively, then lower. Repeat the sequence, this time pausing for a second at the top of the motion. Lower. Now raise one arm toward the front, taking care to keep your thumb pointed upward just slightly, and the other out to the side. Lower, then repeat, this time pausing at the top. Lower, and repeat the sequence on the other side.
Kettlebell Single-Arm Press
Stand with your feet shoulder-width apart, and hold a kettlebell in front of your shoulder with your palm in, elbow tucked, and the weight resting on the top of your forearm. Press it straight up, rotating your arm so your palm faces forward. Do the same number of presses for both arms.
Front Raises
Grab a pair of dumbbells and let them hang at arm’s length next to your sides, with your palms facing each other. Bend your elbows just slightly and hold them that way. Raise your arms straight in front of you until they’re parallel to the floor and perpendicular to your torso. The dumbbells should be at shoulder level and the thumb sides of your hands should be facing up. Pause, then slowly lower the dumbbells back to the starting position.
3-Way Shoulder Raise
Stand with your feet shoulder-width apart, with dumbbells in each hand. Lift laterally first, keeping your arms straight and raising dumbbells to shoulder height. Pause briefly with weights at the sides, then bring them in front of you, making sure to keep your arms straight. Keep going until the dumbbells almost meet in the middle, then still keeping arms straight, lift the dumbbells overhead. Reverse the sequence to come back down, so return from overhead to centre, then out to sides and finally bring the dumbbells back down to the start.
Shrugs
Hold a dumbbell in each hand by your side with your palms facing inward. Raise your shoulders as high as you can, then lower them back down and repeat.
Checking BMI For Body Weight? It Can Wrongly Mark You As Overweight or Obese, Says Study
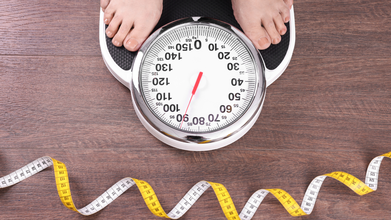
Credit: iStock
Long considered a standard tool for assessing body weight, Body Mass Index (BMI) may not be as reliable as once believed. A new study shows that relying on BMI can incorrectly classify people as overweight or obese.
When a team of Italian researchers used the gold standard technique of dual-energy X-ray absorptiometry (DXA) to measure body fat in the general population, they found that the traditional WHO-approved BMI classification system misidentified a significant number of people as having overweight or obesity.
How Is The BMI Wrong?
A total of 1,351 adults of mixed gender aged between 18 and 98 years were checked for their body weight using the DXA system.
The results, published in the journal Nutrients, revealed that more than one-third (34 percent) of those with obesity defined by BMI had been misclassified and should be in the overweight category.
For those with an overweight BMI, DXA showed that more than half – 53 percent – had been misclassified – three quarters of those misclassified fall into the normal weight category, while the other quarter should have been classified as having obesity.
The DXA analysis found that the prevalence of overweight and obesity across the cohort was around 37 percent overall (23.4 percent overweight, and 13.2 percent obesity, compared to 26.2 percent and 14.1 percent with BMI).
“In the past few years, there has been a lot of criticism of the BMI system due to its inability to accurately capture body fat percentage or distribution, to correctly categorise weight status based on adiposity,” said Professor Marwan El Ghoch, of the Department of Biomedical, Metabolic and Neural Sciences, University of Modena and Reggio Emilia, Modena, Italy.
Also read: Your BMI Does Not Reflect Your Health: New Study Warns How It Misses A Key Health Aspect
Despite these concerns, BMI as a weight classification system continues to be used in the general population in primary healthcare (i.e., general practitioners) and non-clinical (i.e., policy and health insurance) settings, he added.
The researchers urged revising public health guidelines to consider combining direct body composition or their surrogate measures, such as skinfold measurement or body circumference, with the waist-to-height ratio, with BMI, while assessing weight status in the general population.
Waist-to-Height Ratio May Be More Accurate: The India Story
In January 2025, India revamped its obesity guidelines, and the new approach focused on abdominal obesity and comorbid diseases, rather than just BMI.
According to the redefining team, it was essential to move beyond BMI-only approaches to tackle the ever-growing number of people related to other major health risks. They stated that while BMI can be a screening tool, obesity must be defined by body fat.
“BMI should be used for screening purposes, but obesity should be confirmed ideally by a measure of body fat wherever feasible, or another measure such as waist circumference, WHR, or Waist-to-height ratio,” Dr. Naval Vikram, Professor of Medicine, at AIIMS, New Delhi, was quoted as saying to IANS at the time.
Also read: 41 million children aged 5-19 living with high BMI in India: Study
What Do The New Guidelines Say
It recognizes abdominal fat — closely linked to insulin resistance — as a key factor in the diagnosis. It integrates the presence of comorbidities — such as diabetes and cardiovascular disease — into the diagnostic process.
The revised guidelines also introduce a two-stage classification system, addressing both generalized and abdominal obesity.
Stage 1 Obesity: Increased adiposity (BMI > 23 kg/m²) without apparent effects on organ functions or routine daily activities.
Stage 2 Obesity: Advanced state of obesity with increased BMI more than 23 kg/2, and abdominal adiposity; excess Waist Circumference or Waist-to-Height Ratio.
Exercising Could Make Your Brain Younger, Says Doctor

Credits: Canva
What if your gym routine is doing far more than helping you stay fit? Research is increasingly showing that exercise, especially strength training, plays a powerful role in keeping your brain sharp, focused and resilient over time. In fact, Dr Sudhir Kumar, a neurologist at Apollo Hospital in Hyderabad also pointed this out by quoting the study Randomised Controlled Trial of Resistance Exercise and Brain Ageing Clocks.
The study showed that resistance training could reduce brain age by up to two years. This means strength workouts could help the brain maintain characteristics that are seen in younger people.
It Is Not Just About Muscles
For a long time, workouts were seen as a way to build muscle or lose weight. Now, experts suggest that resistance training can also support brain health in meaningful ways. Regular strength training has been linked to slowing down brain ageing, with some studies suggesting it may even reduce the brain’s biological age by a couple of years.
This means that beyond physical strength, your brain could function more efficiently, particularly in areas like memory and reasoning.
Sharper Focus And Better Memory
One of the most noticeable benefits of working out is how it improves everyday thinking. People who engage in regular strength training often report better focus, improved memory and stronger decision-making abilities.
It becomes easier to stay on track with tasks, manage distractions and process information more clearly. Over time, these small improvements can make a big difference in both personal and professional life.
What Happens Inside Your Brain
The real transformation happens beneath the surface. Exercise triggers the release of chemicals that support brain cells and strengthen the connections between them.
This helps improve neuroplasticity, which is the brain’s ability to adapt, learn and form new memories. It also supports white matter, the network that allows different parts of the brain to communicate effectively.
In simple terms, your brain becomes faster, more flexible and better at handling challenges.
A Natural Way To Reduce Brain Fog
Exercise also helps tackle inflammation in the body, which is often linked to brain fog and cognitive decline. Strength training supports anti-inflammatory processes that protect brain health over time.
This is why many people feel mentally clearer and more energized after a consistent workout routine.
You Do Not Need Intense Training
The best part is that you do not need extreme workouts to see benefits. Experts suggest that even two to three strength training sessions a week can support brain health.
Simple movements like squats, push-ups or resistance band exercises are enough to activate both your body and mind.
How Leg Stiffness Impacts Spine Health: Tips For Gen Z Fitness Enthusiasts
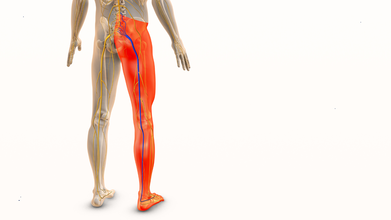
Credit: iStock
Today, the fitness scene has gained much traction among the Gen Z population. With more and more young people spending time in the gym and working out, it is important for fitness enthusiasts to remember the importance of leg stiffness and its impact on spine health. Leg stiffness has the potential to cause unnecessary strain on the spine and back during workouts.
From a neurosurgical point of view, we see that the spine is not just a mechanical support structure but a sensitive pathway through which the spinal cord and nerve roots run. Repeated micro-strain caused by poor flexibility can cause young patients to suffer early degenerative changes that may cause nerve irritation.
We also see that strengthening the abdominal muscles is essential in stabilizing the spine, thereby preventing disc injuries. Early intervention in minor complaints, such as back stiffness or nerve pain, is essential in preventing more serious problems that may need surgical intervention.
The Link Between Leg Stiffness And Spine Health
The muscles in your legs are important for your spine's health. The hamstring, hip flexor, and calf muscles are all significant players in the movement and positioning of your spine. Leg stiffness has the potential to cause unnecessary strain on the spine and back. Leg stiffness limits the movement and positioning of the hips and the spine.
When these muscle groups are tight, they alter pelvic alignment and increase load on the lumbar spine. Over time, this abnormal biomechanics can lead to disc stress and facet joint overload.
In neurosurgical practice, we often see young patients presenting with early symptoms of nerve compression where underlying muscle imbalance and stiffness play a contributory role.
Common Gym Mistakes That Increase The Risk
For young people, the main focus in the gym is on strength training, while flexibility and rest are ignored. This makes the condition of the legs stiffer. Another common error is improper posture while performing certain exercises in the gym. When the legs and hips are inflexible, proper posture is difficult, which causes pressure on the spine.
Sitting for a long time, studying, playing games on gadgets, etc., causes the hip flexors and the hamstring muscles in the legs to become stiffer, which causes pressure on the spine.
From a clinical standpoint, improper lifting techniques combined with stiffness can increase the risk of lumbar disc prolapse and nerve root irritation, conditions frequently encountered in spine clinics.
Tips to Prevent Spine Problems In The Gym
- Warm-ups: It is important to warm up the body before performing weightlifting exercises in the gym. It is recommended that the warm-up process take at least 5–10 minutes.
- Flexibility: It is important to include flexibility exercises in the gym routine, as they help in the proper movement of the legs, which in turn helps in preventing spine problems.
- Proper Posture: It is important to maintain proper posture while performing certain exercises in the gym, like squats, deadlifts, etc.
- Stretching After Workouts: This will help in the release of tension in the muscles and prevent the buildup of stiffness.
- Balance of Training and Recovery: This will help in maintaining the flexibility of the muscles and the spine.
Additionally, from a neurosurgical perspective, core strengthening plays a crucial role in stabilizing the spine and reducing the risk of disc-related injuries. Early attention to minor symptoms like back stiffness or radiating pain can prevent progression to more serious conditions requiring intervention.
Common Spine Problems To Avoid
Common spine problems to avoid during gym workouts include Herniated Disc, Sciatica, Spondylolisthesis, and Muscle Strain. These can occur from poor form, heavy lifting, or lack of warm-up.
In advanced cases, such conditions may lead to nerve compression requiring specialized evaluation and, rarely, surgical management. However, most of these issues are preventable with correct technique and conditioning.
Fitness enthusiasts in the Gen Z generation need to understand that it is very important to develop strength in the body while at the same time maintaining flexibility. The solution to the problem of a stiff leg is the foundation of protecting the spine and improving workout performance. This is achievable through the right warm-up, correct workout, and correct lifting.
Dr. Gaurav Batra is a Consultant - Neurosurgeon (Brain & Spine) at Max Hospital, Vaishali.
- Follow Us :


© 2024 Bennett, Coleman & Company Limited