- Health Conditions A-Z
- Health & Wellness
- Nutrition
- Fitness
- Health News
- Ayurveda
- Videos
- Medicine A-Z
- Parenting
Muscle Building Over 40: Basic Medications And Training Routine

Muscle Building Over 40: Basic Medications And Training Routine
Reaching the milestone of 40 often brings a certain apprehension with it, particularly as one's success in fitness goals and staying fit becomes increasingly difficult. You could be faced with reality in your older age-mostly stiff joints, sluggish recovery, and an apparent declining capability to do the same exercises you used to do back in the days. Do not fear, because age is indeed just a number when talking about muscle building.
With the right mindset, strategy, and training program, you can achieve significant muscle growth and strength well into your 40s. In this guide, we will understand the challenges and solutions of muscle building over 40, giving expert advice and a sample training routine to get you started.
As we age, several factors affect our ability to build muscle, recover, and stay motivated. Understanding these challenges will help you adapt your training to maximize your results.
Motivation and Goal Shifts
Many people experience a shift in motivation to train due to growing older. Some of the members may lose interest, not be able to identify concrete goals, or simply have too much stress due to the new exercise. Therefore, it is necessary to redirect thinking towards healthy fitness: gradual progress instead of perfection. It is helpful for creating small, achievable objectives.
Slow Metabolism
Metabolism is slowed down beyond 40 years. It may become difficult to lose any fat and gain any more muscle. Strength training actually boosts metabolism, because in doing so, one increases their lean muscle mass, which assists in burning calories even during rest.
Recovery Issues
The older we get, the longer it will take our muscles and joints to recover from a workout. That doesn't mean you can't train hard, but you will pay closer attention to rest, recovery, and injury management. Adding adequate sleep, hydration, and mobility work is of most importance.
Time and Balance
Many people over 40 have pressing responsibilities, such as family and work and personal things, that leave little time to fit in training and maintain a balanced workout schedule. It's about doing things efficiently. If you can't take an hour or more out of your busy life to train, train smarter, not harder. Compound movements, routine, and fitting the schedule into your busy life are essential.
Can You Build Muscle After 40?
The good news is that despite these challenges, building muscle after 40 is perfectly possible. In fact, your body is still capable of gaining. The difference is within how you train and how you approach your workouts. As people age, they will want to adapt their training program and minimize the risk of potential injury while still achieving great results.
It is essential that you work on compound exercises and big lifts that hit multiple parts of your body at a time. The best bodybuilding movements are squats, deadlifts, bench press, and rows. Adjust these to suit your body when weaknesses and joint pain would come about as you age over 40.
Workout Routine for Building Muscle over 40
Here is an example of a training routine that should help you build muscle while taking into account the special problems of aging.
Before any session, warm up and do 1 to 3 sets of the following exercises. This will increase blood flow in your body and prepare it for the workout that is to follow:
- Squat jumps or box jumps – 10 reps
- Inverted rows – 10 reps
- Reverse lunges – 10 reps each leg Push-ups – 10 reps Hanging leg lifts – 10 reps
These exercises will engage your entire body, so you avoid injury and get the most out of your workout.
Modifying the Basics of Workout Routine
1. Squats
Squats are a basic exercise for building lower body strength and muscle mass. However, as you age, joint strain, especially in the knees and hips, can be expected if you do not correct your form or use too heavy of a weight. Focus on using a full range of motion, lowering the weight you are using, and work your way back up slowly. You may also have success with variations such as box squats, Bulgarian split squats, or front squats to reduce your joint strain.
2. Bench Presses
Bench presses are, of course, a mainstay of upper body strength training; however, as you enter your older years, issues with shoulder pain can become commonplace. Dumbbell presses utilizing a 45-degree angle by your upper arms or switching to a neutral grip reduces shoulder strain. Form counts here, and do not try to lift too much too soon.
3. Shoulder Presses
Overhead shoulder presses are excellent for building upper body stability. If using a barbell causes discomfort in your shoulders, switch to dumbbell presses, Arnold presses, or one-arm landmine presses. These alternatives allow for better control and reduce strain on the shoulder joints.
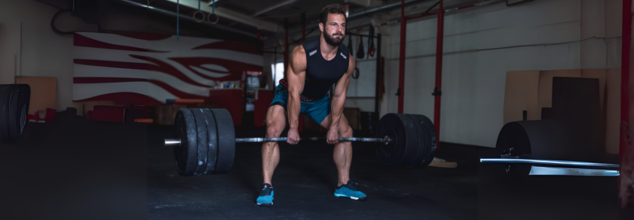
4. Deadlifts
Deadlifts are a staple for overall strength and muscle building, but it can be tough on the back and hips, especially for taller lifters. Try partial deadlifts (from blocks or a bench) to reduce the range of motion and focus on the upper part of the lift. Trap bar or dumbbell deadlifts are also great alternatives that place less strain on your lower back.
5. Barbell Curls
Barbell curls are a staple exercise for building biceps, but they can strain the lower back and shoulders. Seated dumbbell curls or spider curls would be good alternatives to reduce stress on the back while targeting the arms just as effectively.
6. Pull-Ups
Pull-ups were considered the best exercise for building back muscles, but they can often be difficult. This is especially true when you age. Instead of doing traditional pull-ups, inverted rows are a good alternative: They make use of your bodyweight at a more manageable angle but still effectively target the muscles in your back.
Building muscle after 40 is perfectly possible—it even allows one to transform his body and feel stronger, more powerful, and capable. It depends on adopting a balanced training program that incorporates compound movements, recovery, and limitation-based exercises. You can build strength, muscle, and confidence well into your forties and beyond, all with the right mindset and training approach.
What Could The Cracking Of Your Joints And Knuckles Mean?

Credits: Canva
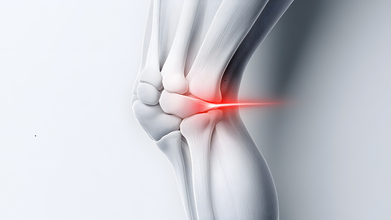
If your knees crack when you stand up or your back lets out a dramatic pop during a morning stretch, you’re definitely not alone. These sounds, medically known as crepitus, are incredibly common. For most people, they are harmless and simply part of how the body moves. Still, those noises can be unsettling, especially when they happen often. So what’s really going on inside your joints, and how do you know when it’s time to pay attention?
Joints are where two bones meet, allowing movement and flexibility. As they move, it’s normal for them to make sounds. Most of the time, these noises are nothing to worry about. But in some cases, they can signal wear and tear or an underlying issue that deserves a closer look.
What Causes Joints to Crack and Pop?
There isn’t just one reason joints make noise. Several everyday processes inside the body can create pops, clicks, or cracks.
Gas bubbles in joint fluid
One of the most common causes is gas escaping from synovial fluid, the liquid that lubricates your joints. This fluid contains gases like oxygen and carbon dioxide. When you move suddenly, tiny gas bubbles can form and collapse, creating a popping sound. This is completely normal and does not damage the joint.
Tendons and ligaments shifting
Tendons and ligaments help stabilize joints. Sometimes, they slide over a bone and snap back into place during movement. This can cause clicking or popping, especially in the knees, shoulders, and ankles. It’s often noticed during exercise or when you change positions quickly.
Cartilage wear over time
Cartilage cushions the ends of bones and prevents friction. With age, overuse, or repetitive strain, cartilage can thin out. When that happens, joint surfaces may rub more than usual, leading to grinding or grating sounds. This can be an early sign of osteoarthritis, especially if discomfort is also present.
Tight muscles and limited flexibility
After long periods of sitting or intense workouts, muscles and tendons can tighten. As they move over bones, they may create soft snapping or clicking sounds. This is common in people with sedentary routines or those who repeat the same movements daily.
When Should Joint Noises Raise Concern?
Most cracking and popping is harmless, but certain signs suggest it’s time to be cautious.
Pain, swelling, or warmth around a joint may point to inflammation, ligament injury, or arthritis. A sudden loud crack followed by pain or instability could indicate a tear, particularly in the knee. If popping is paired with stiffness or locking, it may be related to meniscus problems or other structural issues. Joint noises that begin after an injury, such as a fall or sports impact, should always be evaluated.
Does Cracking Joints Cause Arthritis?
Despite what many people were told growing up, cracking your knuckles does not cause arthritis. Research has found no direct link between joint cracking and arthritis development. While excessive cracking might cause mild swelling or temporary discomfort, it does not damage the joints or lead to arthritis.
How to Reduce Joint Popping?
If joint noises bother you, small lifestyle changes can help. Regular movement keeps joints flexible and well-lubricated. Stretching tight muscles and strengthening the muscles around joints can reduce strain. Maintaining a healthy weight lowers pressure on knees and hips. Proper warm-ups, hydration, and a nutrient-rich diet also support joint health.
When To See A Doctor?
Joint sounds alone are usually harmless. But if they come with pain, swelling, stiffness, or reduced movement, it’s wise to consult a healthcare professional. Early evaluation can prevent further damage and help you stay mobile and comfortable in the long run.
7 Standing Exercises To Build A Stronger Core, Better Balance And Control

(Credit-Canva)
When it comes to building a strong core, most of us think about exercises like crunches, or sit ups. But there is a lot more to core strength than that. One of the main aspects of core strength is stability and balance. While the floor exercises are helpful, they strain your neck muscles, so what can one do?
You can build a powerful, stable midsection entirely on your feet. Standing core workouts are often more "functional" than traditional crunches because they mimic how your body actually moves in daily life, twisting, carrying, and resisting gravity.
7 Standing Exercises For Strong Core
These are some exercises you can try. They will not only help you build strong core muscles but also build your coordination and balance.
Standing Bicycle Crunches
This move is a fantastic way to wake up your entire abdominal wall. By bringing your opposite knee and elbow together in front of your body, you force your obliques to rotate and your front abs to crunch while standing. It also challenges your brain and balance as you switch from leg to leg. Focus on bringing the knee high rather than just pulling your neck down.
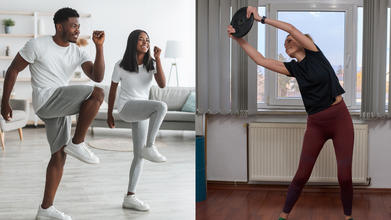
High-Intensity High Knees
This move brings a cardio element to your core training. By quickly driving your knees toward your chest, you engage the lower abdominals and hip flexors. It requires a lot of energy and keeps your heart rate high while forcing your abs to stabilize your upright torso. If the jumping is too much, you can perform it as a slow, powerful march instead.
Standing Dumbbell Side Crunch
Think of this as a side-bend with a purpose. By holding a weight in one hand and leaning toward it, you stretch the opposite side of your waist. The real work happens when you use those side muscles to pull your body back to a perfectly straight, upright position. It is one of the best ways to build lateral strength and define the sides of your torso.
Cable or Band Wood Chop
The wood chop mimics the diagonal motion of swinging an axe, which is a powerful, functional movement. It trains your core to handle rotational force, which is essential for sports like golf or tennis. As you pull the weight across your body, keep your hips stable and let your midsection drive the motion. This builds a core that is both strong and incredibly mobile.
Offset Marching
Holding a weight in one hand while marching forces your body to stabilize against an uneven load. Every time you lift a knee, your core has to fire to prevent you from wobbling or tipping toward the weighted side. This exercise is excellent for improving balance and strengthening the deep "hidden" muscles of the belly that keep your hips and lower back healthy.
The Pallof Press
This is an "anti-rotation" exercise, meaning the goal is to resist movement rather than create it. As you press a cable or band away from your chest, the tension tries to pull you sideways. Your core must stay tight to keep your hands centered. It is a subtle but intense burner that builds incredible stability in the deep abdominal layers and the obliques.
Heavy Suitcase Carry
This exercise is as simple as it is effective. By carrying a heavy weight on just one side, your core must work constantly to keep you from leaning over. This "anti-leaning" action recruits the deep muscles that protect your spine and improve your posture. Imagine there is a string pulling the top of your head toward the ceiling as you take steady, controlled steps.
This Is Exactly How Much You Need To Exercise To Control Your Blood Sugar

(Credit-Canva)
Your heart health does not depend on how much or intensely you exercised when as a young adult. Instead, a new study shows adults need five hours of exercise weekly to keep their heart healthy. This new research suggests that staying active through middle age is the key to preventing high blood pressure (hypertension) later in life
A long-term study published in American Journal of Preventive Medicine. of over 5,000 people found that while many people start out active in their 20s, those habits often slip away as they get older.
How Many Hours Do You Need To Exercise?
The study, led by experts at the University of California, San Francisco (UCSF), tracked participants for 30 years. They found that the current minimum exercise recommendations for adults might not be enough to regulate high blood pressure.
Currently, the standard advice is about 2.5 hours of moderate exercise per week. However, scientists found that people who worked out for five hours a week, double the minimum right now, and significantly lowered their risk. The benefit was strongest for those who kept up this routine until they reached age 60.
Why Does The Older Generation Need To Exercise More?
Between the ages of 18 and 40, most people’s activity levels drop significantly. As young adults move into college, start careers, or become parents, leisure time disappears, and exercise often falls to the bottom of the priority list.
Researchers noted that nearly half of the young adults in the study weren't active enough, which directly linked to seeing their blood pressure rise as they entered middle age.
High blood pressure is often called a "silent killer" because most people don’t feel any symptoms, yet it affects billions of people worldwide. If left unchecked, it can lead to:
- Heart attacks and strokes.
- An increased risk of dementia.
- General heart disease.
The World Health Organization reports that more than 25 percent of men and 20 percent of women deal with this condition.
Researchers pointed out that things like neighborhood safety, work responsibilities, and socioeconomic challenges can make it harder for some groups to maintain a consistent workout routine over several decades.
Easy and Cost Effective Ways To Control Hypertension
Controlling high blood pressure doesn't have to be expensive. By making simple lifestyle adjustments, you can significantly improve your heart health. Mayo Clinic suggests,
Move More and Sit Less
You should aim for 30 minutes of daily aerobic activity like walking, cycling, or dancing. Adding strength training twice a week helps even more. Regular movement can lower your blood pressure by 5 to 8 mm Hg. Replacing habits like driving to a nearby place with walking and taking the stairs instead of the elevator can also help.
Eat Smart and Reduce Salt
Diets like the Mediterranean diets, which has fruits, vegetables, and whole grains helps a lot. By lowering salt intake to 1,500 mg daily and eating potassium-rich foods can drop blood pressure by up to 11 mm Hg. Mayo clinic suggest that one must avoid processed foods and use herbs instead of table salt.
Ditch Harmful Habits
Limiting alcohol and quitting smoking are two of the fastest ways to improve your numbers. Smoking spikes blood pressure immediately, while excessive drinking makes heart medications less effective.
Prioritize Rest and Stress Relief
Aim for 7–9 hours of quality sleep, stress management is equally important, so practice saying "no" to extra tasks, focus on things you can control, and take time for hobbies.
Monitor and Support
Track your blood pressure at home and keep regular doctor appointments. Don't go it alone; involve friends or join a support group to stay motivated.
© 2024 Bennett, Coleman & Company Limited

