- Health Conditions A-Z
- Health & Wellness
- Nutrition
- Fitness
- Health News
- Ayurveda
- Videos
- Medicine A-Z
- Parenting
- Web Stories
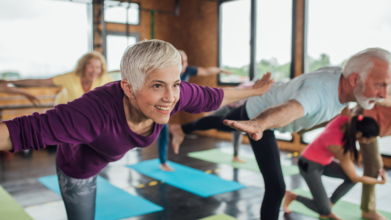
7 Yoga Poses That Help You With Anxiety

(Credit-Canva)
We have long known about the numerous benefits of Yoga on our body and any ailment that we may have. Yoga promotes a ‘healing from within’ mentality, it helps people heal themselves through their body. Another benefit that yoga has is on mental health. Harvard Health Publishing explains that yoga emphasizes on breathing practice and meditation, both of which are things that have been shown to have great effect on your mental health, whether it is depression or anxiety.
They further explain how yoga helps your brain develop several new connections and even alter the structure of your brain. You will notice better cognitive skills like learning and remembering things. These areas of your brain are said to shrink with age, but studies have shown that there was less shrinkage in the brains of people who did yoga.
How Does Yoga Help Anxiety?
Some studies have looked into how yoga affects our brains and bodies when we're feeling anxious. An older study from 2005, published in British Journal of Sports Medicine, found that yoga might help with different kinds of anxiety, like feeling nervous before an exam or having obsessive thoughts. While we need more research to fully understand the connection, these studies suggest that yoga's combination of movement and meditation could be a helpful tool. It's like training your brain to relax, even when things feel chaotic.
Yoga Poses That Relieve Anxiety
When you're stressed, your body releases hormones that can make you feel anxious. Yoga helps lower these stress hormones, calming your nervous system. By focusing on your breath, you slow down your heart rate and breathing, which can ease anxiety symptoms. Here are some poses you must try.
Sukhasana
Sit comfortably with crossed legs, keeping your back straight. This pose helps you focus on your breath and align your spine. It's great for calming the mind and preparing for meditation. Just sit and breathe, feeling your body relax and your thoughts settle down.
Upward-Facing Dog
Lie on your stomach, push up with your hands, and lift your chest. This opens up your chest and allows for deeper breathing. It helps to release tension in your back and shoulders. Think of it as opening your heart and lungs, letting in fresh air and positive energy.
Downward-Facing Dog
Start on your hands and knees, then lift your hips up. This inverted pose calms your mind and stretches your whole body. It's great for relieving stress and fatigue. Feel your body lengthening and your mind quieting as you hold this pose.
Forward Bend
Stand tall, then bend forward from your hips. This pose stretches the back of your legs and calms your mind. It's a gentle way to release tension and find inner peace. Let your head hang loose and feel the stretch in your hamstrings.
Child’s Pose
Kneel down and fold forward, resting your forehead on the ground. This is a relaxing pose that helps relieve stress. It's like giving yourself a gentle hug, allowing your body to rest and recover. It allows your body to relax deeply.
Savasana (Corpse Pose)
Lie flat on your back, with your arms and legs relaxed. This pose calms your nervous system and promotes deep relaxation. It's the final pose in yoga, allowing your body and mind to completely rest. Just breathe and let go of any tension.
Can Exercising Help Prevent Cancer? Study Says It Cuts Risk By 30%

Credits: Canva
Just one bout of physical activity, specifically resistance training or high-intensity interval training (HIIT) may trigger a measurable anti-cancer response in the body. That’s not wishful thinking. It’s the takeaway from a compelling new study by researchers at Edith Cowan University (ECU) in Australia, who found that a single workout could slow the growth of cancer cells by as much as 30%.
While exercise has long been considered a complementary therapy in cancer care, this study sharpens the focus. It suggests that even short-term, intentional movement could offer physiological benefits for breast cancer survivors at the cellular level. And that’s a big deal.
Led by PhD researcher Francesco Bettariga, the ECU study explored how exercise impacts breast cancer survivors not just in the long term, but immediately. The team zeroed in on myokines, which are proteins secreted by muscles during exercise. Myokines are emerging as powerful players in the body’s defense system, with proven anti-inflammatory and anti-cancer effects.
Participants in the study—all breast cancer survivors underwent either a single session of resistance training or HIIT. Researchers then measured their blood before, immediately after, and 30 minutes post-exercise. The results showed a clear and consistent increase in myokine levels across both workout formats.
This spike wasn’t just theoretical. Bettariga’s lab data indicated that these boosted myokine levels could reduce the rate of cancer cell growth by 20–30%, after just one session.
Why It Is More Important for Breast Cancer Survivors?
We already know that cancer—and the treatments used to fight it—can wreak havoc on the body’s immune system and metabolism. Fatigue, inflammation, muscle loss, and long-term damage to cellular function are all common side effects. That’s part of what makes this study so significant: it demonstrates that even bodies under considerable strain from cancer treatment can still mount a biological defense through exercise.
“The results from the study show that both types of exercise really work to produce these anti-cancer myokines in breast cancer survivors,” Bettariga noted. “The implications are powerful—this is strong motivation to integrate exercise into cancer care.”
What’s unique here is the immediacy. Most studies emphasize the long-term benefits of exercise over weeks or months. This one highlights a biochemical response that kicks in within minutes.
Link Between Inflammation And Body Composition?
Beyond myokines, the study also looked into another critical component of cancer recurrence: inflammation.
Persistent inflammation plays a major role in tumor progression. It promotes the survival and spread of cancer cells and suppresses the immune response, making it harder for the body to fight back. Worse, both cancer and its treatments can increase inflammatory biomarkers in the bloodstream.
According to Bettariga’s extended research, the answer lies in body composition—specifically, reducing fat mass and increasing lean muscle through consistent exercise.
“Strategies are needed to reduce inflammation,” he said, “which may provide a less supportive environment for cancer progression, leading to a lower risk of recurrence and mortality in survivors of breast cancer.”
Building lean muscle through resistance or interval training doesn’t just make you stronger. It could actually help change the biochemical environment of your body to be less hospitable to cancer cells.
Why Diet Alone Isn’t Enough?
The study also underscores an important caveat: quick-fix weight loss strategies don’t deliver the same benefits. In fact, losing weight without preserving or building muscle may do more harm than good.
“You never want to reduce your weight without exercising,” Bettariga cautioned. “You need to build or preserve muscle mass and produce these beneficial chemicals—like myokines—that you can’t get through diet alone.”
That means crash diets, juice cleanses, or calorie-cutting without movement won’t contribute meaningfully to the anti-inflammatory or anti-cancer response. The muscle is the medicine in this case—and it has to be activated.
How to Add HIIT or Resistance Training into Your Routine?
If this all sounds powerful but overwhelming, start simple. The study wasn’t testing elite athletes. It was studying real breast cancer survivors, many of whom were new to structured exercise routines. For resistance training: Think compound movements that target large muscle groups—like squats, lunges, push-ups, or lifting light weights. You don’t need a gym or equipment to start. Even bodyweight training done consistently can build lean mass.
For HIIT, try alternating 30 seconds of high-effort movement (like jumping jacks, stair climbs, or brisk uphill walking) with 1–2 minutes of slower recovery. Repeat the cycle for 15–20 minutes.
The key isn’t the duration, it’s the intensity and consistency. According to Bettariga’s findings, even one session is enough to jumpstart the body’s internal defense mechanisms.
Can This Improve Future of Cancer Care?
There’s a growing shift in how we view recovery and survivorship. No longer is exercise considered a “bonus” or “optional.” Increasingly, it’s being recognized as a core component of medical care—one that can potentially alter the trajectory of disease, especially in cancers with high recurrence rates like breast cancer.
While more research is needed to explore the long-term implications of myokine production and its effect on cancer recurrence, the current data is promising. At a time when many cancer survivors are looking for ways to reclaim control over their bodies, this study offers something rare: a simple, immediate action that can make a real difference.
Strength Training The Right Way - How To Do Dumbbell Rows Properly

(Credit-Canva)
It is very easy to do exercises wrong, especially strength exercises. The reason why one must be careful when they are doing weights is because you could end up overexerting one certain muscle and not get the results you wanted. One such exercise is dumbbell row.
Sitting at a desk all day or focusing on "pushing" exercises like bench presses can lead to rounded shoulders and back pain. Dumbbell rows are a "pulling" exercise that helps balance your body. They strengthen your back muscles, which can improve your posture and reduce common aches and pains from daily life.
How to Do a Dumbbell Row
Dumbbell rows are a simple yet effective exercise. Here's a step-by-step guide to doing them correctly:
- Place a workout bench in front of you. Stand with your feet about shoulder-width apart.
- Steady yourself by putting your right hand on the bench. Pick up a dumbbell with your left hand.
- Keep your back straight, creating a diagonal line from your head to your hips. Your shoulders should be slightly higher than your hips.
- Keeping your left arm close to your body, pull the dumbbell straight up toward the ceiling. Your spine should stay completely still—only your arm and shoulder should move.
- Slowly and with control, lower your arm back down to the starting position.
Tips for Perfect Form
Even though dumbbell rows seem easy, paying close attention to the details will help you get the best results and avoid injury. To prevent straining your neck, keep your head still and look at a spot on the floor about three feet in front of you. It’s also a good idea to start with your weaker arm first so you can give it your full attention when you have the most energy.
Focus on your breathing. Inhale before you pull the weight up, then breathe out as you pull. Or, you can hold your breath as you pull and breathe out at the top or on the way down. This helps keep your core stable. When choosing a weight, start with a lighter one and work your way up. The last repetition should be difficult, but not so heavy that you have to swing your whole body to lift it. You can also slightly change the angle of your elbow to target different back muscles.
Muscles Worked by Dumbbell Rows
Dumbbell rows are great for building strength in your mid and upper back. This exercise targets several important muscles, including your lats which is the large muscles that keep your back stable and help your shoulders move, your traps which are the muscles in your neck and upper back that help move your head and maintain good posture, and your rhomboids, the upper back muscles that help stabilize your shoulders.
Back pain is one of the most common reasons people see a doctor. By adding dumbbell rows to your workout, you can strengthen the muscles in your back and build better posture. This can lead to less back pain, a stronger core, and an improved range of motion.
Dumbbell rows can be a fantastic part of your fitness routine. However, if you have any health concerns, recent injuries, or long-term medical conditions, it's always a good idea to talk to a doctor or physical therapist before you start a new exercise.
Lifestyle Changes People Above 60 Should Make To Boost Brain Health
Lifestyle changes are necessary at every age. Young adults often get away with eating unhealthily, staying up late and getting up early. However, as you grow older, the effects of staying up beyond a certain time, indulging in alcohol or even overexerting yourself become apparent. So one must make changes to their lifestyle according to their age. As such, people above 60 should pay more attention to certain aspects of their health like their brain health, as they are susceptible to cognitive decline.
A new study shows that a two-year program focused on healthy eating, exercise, and "brain training" helped older adults avoid a decline in their thinking skills. The study, called U.S. POINTER, included more than 2,100 people aged 60 to 79 who had a higher risk for cognitive decline due to factors like a poor diet, a sedentary lifestyle, and a family history of memory problems. The results were presented at the Alzheimer’s Association International Conference in Toronto.
Combination of Healthy Habits
The participants in the study followed a program that focused on three key areas:
Healthy Eating
Participants switched to the MIND diet, a specific eating plan known for supporting brain health. This change from their previous unhealthy diets was a key part of the program to boost cognitive function.
Regular Exercise
The program required participants to meet fitness goals that included a mix of exercises. They did aerobic workouts, resistance training, and stretching to improve both their physical and mental health.
Brain Training
Participants were also tasked with exercising their minds. They used a program called BrainHQ for daily challenges and engaged in other intellectual and social activities to keep their brains active and sharp.
Participants in a more structured version of the program met regularly with staff and peers, while a second group followed a less structured, self-guided plan. The results showed that the structured program provided a greater benefit to brain health. An impressive 89% of all participants completed the two-year study.
Broad Benefits for a Diverse Group
The study found that this program worked well for a wide range of people. It didn't matter if they were male or female, what their ethnicity was, what their genetic risk for Alzheimer's was, or what their heart health was like. Everyone seemed to benefit. The researchers saw a significant improvement in the participants' overall thinking skills, including their memory, attention, and ability to multitask. This research sends a strong message that making healthy choices can have a powerful impact on brain health for many people, and it shows that treatments for diseases like Alzheimer's will likely include both medicine and healthy living.
Physical Activity Guideline For Elderly
According to the UK National Health Services older adults should try to be physically active every day. Regular activity can help improve your overall health and lower your risk of serious conditions like heart disease and stroke. Before starting any new exercise routine, especially if you haven't been active in a while or have health concerns, it's a good idea to talk to a doctor. They can help you choose activities that are safe and right for your fitness level. Here are some goals for them
- Be active daily, this can include light activities like walking.
- Do exercises that improve your strength, balance, and flexibility at least two days a week. This is especially important if you are worried about falling.
- Get moderate exercise, aim for a total of 150 minutes of moderate activity per week. This could be a brisk walk, dancing, or gardening.
- Get vigorous exercise, aim for 75 minutes of vigorous activity per week. This could be jogging or a strenuous hike.
- Reduce sitting time, try to sit or lie down less throughout the day. Break up long periods of inactivity with a short walk or some light movement.
- Follow Us :


© 2024 Bennett, Coleman & Company Limited