- Health Conditions A-Z
- Health & Wellness
- Nutrition
- Fitness
- Health News
- Ayurveda
- Videos
- Medicine A-Z
- Parenting
- Web Stories
Balancing Mind And Body: The Role of Yoga in Managing Anxiety And Depression


Yoga facilitates a deep connection with your inner self, empowering you to realise that you are stronger than any external challenges. By increasing oxygen levels, it calms the sympathetic nervous system and enhances relaxation.
Additionally, yoga balances the body's five elements, particularly the earth (pruthvi) element, which represents stability. This grounding effect through breathing and postures helps alleviate anxiety and emotional instability, making yoga a powerful tool for managing stress and mental health.
Physical and Mental Benefits of Yoga
Yoga has been shown to lower stress hormones like cortisol and increase beneficial brain chemicals such as endorphins and GABA, both of which help elevate mood and alleviate anxiety. Regular practice of yoga enhances the parasympathetic nervous system, which is responsible for calming the body and reducing the "fight-or-flight" response associated with anxiety and stress. Additionally, yoga can improve cognitive functions, boost memory, and even slow brain ageing.
Yoga for Anxiety and Depression
Certain yoga poses are particularly effective in managing anxiety and depression.
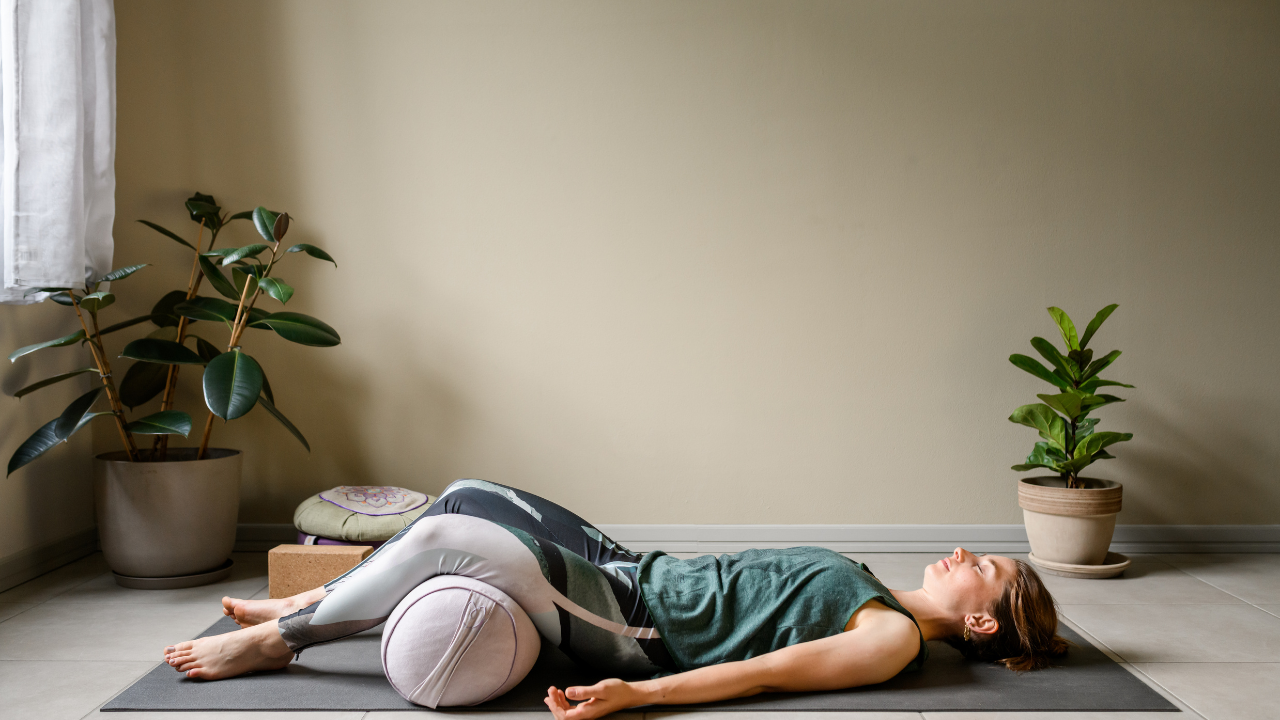
For instance, the Savasana (Corpse Pose) is a deeply relaxing posture that helps in quieting the mind and soothing the nervous system. By focusing on breath control and body relaxation, this pose promotes mindfulness and mental clarity.
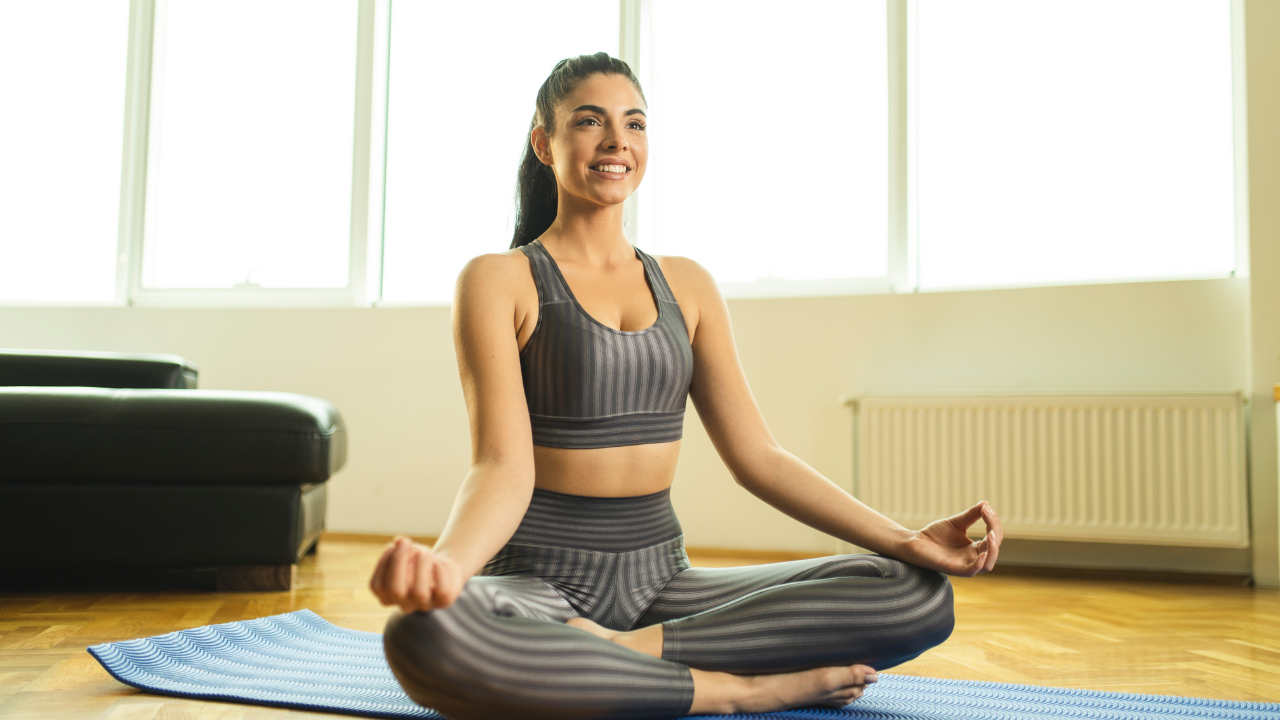
Other poses, like Sukhasana (Easy Pose), facilitate meditation and inner balance, fostering a sense of calm and tranquillity. This seated pose encourages introspection and is commonly used for deep breathing and meditation exercises, which are essential in managing anxiety.
Mindfulness and Meditation
The mindfulness aspect of yoga is particularly beneficial in managing anxiety and depression. By focusing on the present moment and one's breath, yoga practitioners can detach from negative thoughts and emotions, improving mental resilience. This mental focus helps reduce rumination, a key contributor to anxiety and depressive disorders.
Practical Tips for Beginners

Yoga is accessible to individuals of all fitness levels. Beginners should start with simple breathing exercises and basic poses such as the Child’s Pose and Mountain Pose. As flexibility and strength improve, more advanced poses can be incorporated into the routine.
Even practising yoga for 10 minutes a day can yield significant benefits in reducing anxiety and improving mood.
Yoga provides a powerful tool for balancing the mind and body, helping manage the symptoms of anxiety and depression through physical movement, mindfulness, and breathing techniques. Whether you're a seasoned practitioner or a beginner, yoga's mental health benefits are profound and can be integrated into daily life with lasting effects.
Can Exercising Help Prevent Cancer? Study Says It Cuts Risk By 30%


Credits: Canva
Just one bout of physical activity, specifically resistance training or high-intensity interval training (HIIT) may trigger a measurable anti-cancer response in the body. That’s not wishful thinking. It’s the takeaway from a compelling new study by researchers at Edith Cowan University (ECU) in Australia, who found that a single workout could slow the growth of cancer cells by as much as 30%.
While exercise has long been considered a complementary therapy in cancer care, this study sharpens the focus. It suggests that even short-term, intentional movement could offer physiological benefits for breast cancer survivors at the cellular level. And that’s a big deal.
Led by PhD researcher Francesco Bettariga, the ECU study explored how exercise impacts breast cancer survivors not just in the long term, but immediately. The team zeroed in on myokines, which are proteins secreted by muscles during exercise. Myokines are emerging as powerful players in the body’s defense system, with proven anti-inflammatory and anti-cancer effects.
Participants in the study—all breast cancer survivors underwent either a single session of resistance training or HIIT. Researchers then measured their blood before, immediately after, and 30 minutes post-exercise. The results showed a clear and consistent increase in myokine levels across both workout formats.
This spike wasn’t just theoretical. Bettariga’s lab data indicated that these boosted myokine levels could reduce the rate of cancer cell growth by 20–30%, after just one session.
Why It Is More Important for Breast Cancer Survivors?
We already know that cancer—and the treatments used to fight it—can wreak havoc on the body’s immune system and metabolism. Fatigue, inflammation, muscle loss, and long-term damage to cellular function are all common side effects. That’s part of what makes this study so significant: it demonstrates that even bodies under considerable strain from cancer treatment can still mount a biological defense through exercise.
“The results from the study show that both types of exercise really work to produce these anti-cancer myokines in breast cancer survivors,” Bettariga noted. “The implications are powerful—this is strong motivation to integrate exercise into cancer care.”
What’s unique here is the immediacy. Most studies emphasize the long-term benefits of exercise over weeks or months. This one highlights a biochemical response that kicks in within minutes.
Link Between Inflammation And Body Composition?
Beyond myokines, the study also looked into another critical component of cancer recurrence: inflammation.
Persistent inflammation plays a major role in tumor progression. It promotes the survival and spread of cancer cells and suppresses the immune response, making it harder for the body to fight back. Worse, both cancer and its treatments can increase inflammatory biomarkers in the bloodstream.
According to Bettariga’s extended research, the answer lies in body composition—specifically, reducing fat mass and increasing lean muscle through consistent exercise.
“Strategies are needed to reduce inflammation,” he said, “which may provide a less supportive environment for cancer progression, leading to a lower risk of recurrence and mortality in survivors of breast cancer.”
Building lean muscle through resistance or interval training doesn’t just make you stronger. It could actually help change the biochemical environment of your body to be less hospitable to cancer cells.
Why Diet Alone Isn’t Enough?
The study also underscores an important caveat: quick-fix weight loss strategies don’t deliver the same benefits. In fact, losing weight without preserving or building muscle may do more harm than good.
“You never want to reduce your weight without exercising,” Bettariga cautioned. “You need to build or preserve muscle mass and produce these beneficial chemicals—like myokines—that you can’t get through diet alone.”
That means crash diets, juice cleanses, or calorie-cutting without movement won’t contribute meaningfully to the anti-inflammatory or anti-cancer response. The muscle is the medicine in this case—and it has to be activated.
How to Add HIIT or Resistance Training into Your Routine?
If this all sounds powerful but overwhelming, start simple. The study wasn’t testing elite athletes. It was studying real breast cancer survivors, many of whom were new to structured exercise routines. For resistance training: Think compound movements that target large muscle groups—like squats, lunges, push-ups, or lifting light weights. You don’t need a gym or equipment to start. Even bodyweight training done consistently can build lean mass.
For HIIT, try alternating 30 seconds of high-effort movement (like jumping jacks, stair climbs, or brisk uphill walking) with 1–2 minutes of slower recovery. Repeat the cycle for 15–20 minutes.
The key isn’t the duration, it’s the intensity and consistency. According to Bettariga’s findings, even one session is enough to jumpstart the body’s internal defense mechanisms.
Can This Improve Future of Cancer Care?
There’s a growing shift in how we view recovery and survivorship. No longer is exercise considered a “bonus” or “optional.” Increasingly, it’s being recognized as a core component of medical care—one that can potentially alter the trajectory of disease, especially in cancers with high recurrence rates like breast cancer.
While more research is needed to explore the long-term implications of myokine production and its effect on cancer recurrence, the current data is promising. At a time when many cancer survivors are looking for ways to reclaim control over their bodies, this study offers something rare: a simple, immediate action that can make a real difference.
Lifestyle Changes People Above 60 Should Make To Boost Brain Health
Lifestyle changes are necessary at every age. Young adults often get away with eating unhealthily, staying up late and getting up early. However, as you grow older, the effects of staying up beyond a certain time, indulging in alcohol or even overexerting yourself become apparent. So one must make changes to their lifestyle according to their age. As such, people above 60 should pay more attention to certain aspects of their health like their brain health, as they are susceptible to cognitive decline.
A new study shows that a two-year program focused on healthy eating, exercise, and "brain training" helped older adults avoid a decline in their thinking skills. The study, called U.S. POINTER, included more than 2,100 people aged 60 to 79 who had a higher risk for cognitive decline due to factors like a poor diet, a sedentary lifestyle, and a family history of memory problems. The results were presented at the Alzheimer’s Association International Conference in Toronto.
Combination of Healthy Habits
The participants in the study followed a program that focused on three key areas:
Healthy Eating
Participants switched to the MIND diet, a specific eating plan known for supporting brain health. This change from their previous unhealthy diets was a key part of the program to boost cognitive function.
Regular Exercise
The program required participants to meet fitness goals that included a mix of exercises. They did aerobic workouts, resistance training, and stretching to improve both their physical and mental health.
Brain Training
Participants were also tasked with exercising their minds. They used a program called BrainHQ for daily challenges and engaged in other intellectual and social activities to keep their brains active and sharp.
Participants in a more structured version of the program met regularly with staff and peers, while a second group followed a less structured, self-guided plan. The results showed that the structured program provided a greater benefit to brain health. An impressive 89% of all participants completed the two-year study.
Broad Benefits for a Diverse Group
The study found that this program worked well for a wide range of people. It didn't matter if they were male or female, what their ethnicity was, what their genetic risk for Alzheimer's was, or what their heart health was like. Everyone seemed to benefit. The researchers saw a significant improvement in the participants' overall thinking skills, including their memory, attention, and ability to multitask. This research sends a strong message that making healthy choices can have a powerful impact on brain health for many people, and it shows that treatments for diseases like Alzheimer's will likely include both medicine and healthy living.
Physical Activity Guideline For Elderly
According to the UK National Health Services older adults should try to be physically active every day. Regular activity can help improve your overall health and lower your risk of serious conditions like heart disease and stroke. Before starting any new exercise routine, especially if you haven't been active in a while or have health concerns, it's a good idea to talk to a doctor. They can help you choose activities that are safe and right for your fitness level. Here are some goals for them
- Be active daily, this can include light activities like walking.
- Do exercises that improve your strength, balance, and flexibility at least two days a week. This is especially important if you are worried about falling.
- Get moderate exercise, aim for a total of 150 minutes of moderate activity per week. This could be a brisk walk, dancing, or gardening.
- Get vigorous exercise, aim for 75 minutes of vigorous activity per week. This could be jogging or a strenuous hike.
- Reduce sitting time, try to sit or lie down less throughout the day. Break up long periods of inactivity with a short walk or some light movement.
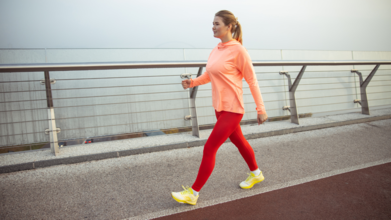
Turns Out, Walking Fast Might Be the Easiest Anti-Aging Trick Yet
Credits: Canva
If you’ve logged thousands of steps this week but walked at a snail’s pace, your fitness gains may be smaller than you think. Recent research is making an important distinction: it’s not how many steps you take, but how fast you’re walking that may hold the key to healthier aging.
Researchers at the University of Chicago Medicine discovered that increasing walking pace by just 14 steps per minute—which brings most older adults to about 100 steps per minute—translated into measurable improvements in physical function. The study focused on individuals classified as frail or pre-frail. Even small boosts in walking speed helped participants walk longer distances, stay more active, and maintain independence.
What’s more, a separate analysis from more than 79,000 adults in low‑income regions found that just 15 minutes of brisk walking daily, rather than long periods of slow-paced walking, delivered a 19% reduction in all-cause mortality, particularly from cardiovascular disease.
So why is brisk walking such a powerful tool for better aging? A faster pace improves heart function, increases VO₂ max (the body's capacity to use oxygen), and helps maintain muscle tone and balance—all vital for reducing fall risk and frailty.
Walking slowly, in contrast, doesn’t challenge the cardiovascular system. It offers movement, but it doesn’t push the body enough to strengthen essential systems. Frailty isn’t just about age; it’s a medical condition marked by:
- Slow movement
- Weakness
- Unintentional weight loss
- Fatigue
- Low mobility
Because these symptoms are closely tied to inactivity, keeping a brisk walking pace becomes effective prevention. A slight uptick in speed can rejuvenate energy levels, preserve muscle strength, and support daily tasks.
Forget the "Talk Test", Try Measured Cadence Instead
Until now, measuring walking intensity relied on the subjective “talk test”—are you breathless enough that you can't sing but can still hold a conversation? But perceptions vary. A new smartphone app—not yet available to the public—demonstrated greater accuracy in measuring walking cadence than typical trackers, offering a more reliable metric for intensity-based health benefits.
How Scientists Put It to the Test?
In a controlled trial, older participants in retirement communities wore thigh-mounted sensors to accurately track cadence. One group walked at a comfortable pace, while the other group was coached to walk as fast as safely possible. Those who managed an extra 14 steps per minute consistently outperformed in walking tests and daily functional tasks. It wasn't about marathon endurance—it was about walking faster, for shorter durations.
This isn’t elite fitness talk—it’s practical public health advice. Brisk walking improves longevity even when overall physical activity remains low. It’s one of the few forms of exercise that:
- Requires no specialized equipment
- Can be done nearly anywhere
- Carries low injury risk
- Provides potent cardiovascular and metabolic benefits
Experts led by Professor Wei Zeng emphasized that brisk walking improves heart health by making it more efficient while reducing obesity and related conditions. The activity raises VO₂ max, which correlates directly with better functional fitness and survival outcomes.
Adding Brisk Walking Into Your Day
Start by establishing your baseline cadence—count the steps you take in 60 seconds while walking normally. Then gradually aim for 14 more steps per minute. That often feels like walking with purpose—not sprinting.
Use tools like metronome apps to match your footfall to a steady beat. While official cadence apps are still in development, consumer tools let you maintain consistency during your walk and track personal progress over time.
Global health bodies warn that physical inactivity now kills 2 million people annually, especially through cardiovascular disease, dementia, and metabolic conditions. In the UK, sedentary lifestyles contribute significantly to deaths among working-age adults.
Rising mortality rates linked to inactivity—compounded by healthcare access gaps, long waits for treatments, and delays in emergency care—make walking fast a simple yet effective countermeasure.
We're not training for marathons. This is about accelerating pace in daily life. Even modest improvements—like brisk walks to run errands or brisk evening strolls—provide systemic uplift to aging bodies. Walking faster improves mobility, posture, and the internal systems that matter most for independence and vitality. Age or fitness level shouldn’t limit you. Here’s how to begin:
- Establish your usual cadence—walk 1 minute at your normal pace and count steps.
- Add 14 steps per minute—gradually, until it feels energetic but sustainable.
- Measure consistently—track progress with a watch, phone app, or metronome.
- Walk brisk daily—15 minutes is enough to start seeing benefits.
- Pair with balance and strength efforts—core, legs, and posture support endurance.
Always consult a health professional if you have cardiovascular, respiratory, or musculoskeletal conditions before significantly increasing your walking pace.
Walking fast isn’t a fad—it’s a scientifically backed way to age better. For older adults, even one minor increase in cadence can mean improved independence, fewer hospitalizations, and a stronger heart. For everyone else, it’s a low-cost, high-impact way to support lifelong wellness.
Before vaccines and sprint workouts took center stage, walking was—and remains—among the simplest anti-aging tools we have. Now science gives us the reason—and the step-by-step to make it easy. So lace up, push the pace, and let every faster stride be your quiet pledge to aging with strength.
- Follow Us :


© 2024 Bennett, Coleman & Company Limited