- Health Conditions A-Z
- Health & Wellness
- Nutrition
- Fitness
- Health News
- Ayurveda
- Videos
- Medicine A-Z
- Parenting
Can Yoga Improve Your Hearing? Ways Yoga Helps Better Our Ear Health

Yoga has a great impact on different aspects of our life. Whether it is our mental health or physical health, yoga plays a vital role. As such, it is no surprise that yoga has a wonderful effect on our hearing and ear health in general.
Hearing, much like other aspects of our body like eyesight, and speech, people mostly take for granted. Any changes in this, whether it is slight loss of hearing or ringing noises in your ears, can cause great discomfort for people. So how can we ensure its well-being? One of the surprising benefit yoga gives us is ear health.
As we journey through life, protecting and even enhancing our hearing becomes increasingly important. Interestingly, ancient practices like yoga and meditation offer a compelling pathway to better auditory health. Beyond stress relief, these techniques boost circulation and sharpen mental focus, creating a positive ripple effect for your ears.
Why Do We Lose Our Hearing?
Beverly Hills Hearing Center explains that hearing can fade for various reasons, including loud environments, infections, or underlying health issues. It might show up as struggling to follow conversations, constantly turning up the volume, or that persistent ringing we call tinnitus. While regular hearing checks are crucial for early detection, incorporating daily habits that support ear health is equally vital.
Yoga That Improves Our Ear Health
According to the Journal of Yoga & Physical Therapy, there are some easy things we can do, like simple neck exercises and deep breathing (called Kumbhak in yoga), to help get more blood and oxygen to our inner ears. Special high-pitched sounds might also help. Here are some poses and mudras you should know.
Nodding "Yes"
Gently lower your chin towards your chest, feeling a stretch in the back of your neck. Then, slowly lift your head back, looking upwards with ease. Repeat this gentle nodding motion several times, keeping it smooth and comfortable.
Tilting Head to Shoulder
Softly tilt your right ear towards your right shoulder, feeling a stretch on the left side of your neck. Then, gently tilt your left ear towards your left shoulder, stretching the right side. Alternate these gentle tilts.
Turning Head Side to Side
Slowly turn your head to look over your right shoulder, holding briefly. Return to the center and then gently turn your head to look over your left shoulder. Repeat this smooth turning motion.
Full Head Circle (360° Head Rotation)
Sitting tall, gently drop your chin to your chest. Slowly roll your right ear towards your right shoulder, then your head back, then your left ear to your left shoulder, completing a slow circle. Repeat in the opposite direction.
Shanmukhi Mudra
Sit comfortably. Place thumbs on ear flaps, index fingers on forehead, middle fingers on eyes, ring fingers on nostrils, and little fingers on upper lip. Inhale deeply, then exhale with a high-pitched humming sound, feeling the vibrations.
Holding Your Breath (Kumbhak)
Sit comfortably, placing index and middle fingers on your forehead. Close your right nostril with your thumb and inhale deeply through the left. Close both nostrils and hold your breath. Then, exhale slowly through your right nostril.
Blowing a Conch Shell (Shankha Naad)
Sit upright, gently tilting your head back. Take a deep breath and blow into the conch shell, gradually increasing the force to create a rising pitch. Focus on the sound and the vibration it creates.
Oprah Winfrey Shares Her Fitness Journey While Being On GLP-1 Weight-loss Drugs

Credits: Instagram
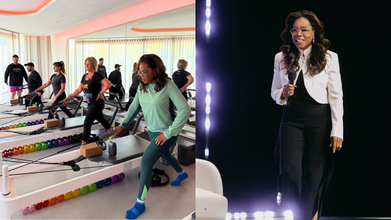
“I would have been thinking, ‘How many calories in that croissant? How long is it going to take me to work it off? If I have the croissant, I won’t be able to have dinner.’ I’d still be thinking about that damn croissant!” This morning, however, she is blissfully unbothered: “I felt nothing. The only thing I thought was, ‘I need to clean up these crumbs.’ ” These are the thoughts that would come to Oprah Winfrey's mind whenever she would try to eat something butter, she shared in an interview with PEOPLE. However, now, she can eat a croissant, like a croissant, without being obsessed about it for an entire day. “I’ve just had a croissant. And I ate the full thing,” she said describing her breakfast.
Winfrey started taking GLP-1 weight-loss jabs two and a half years ago, when she thought that she suffers from obesity and she cannot fight it without help. “I thought it was about discipline and willpower. But I stopped blaming myself,” said Winfrey.
Also Read: Explained: Indore Water Contamination Linked to E. coli and Klebsiella Bacteria — What Are They?
From Diet Culture to Self-Blame
These medications transformed the way she looked at life. As she soon turns 72 on January 29, she no longer sees exercise as a punishment. She said she could be happily "side-planking and deadlifting." She now no longer drinks alcohol. “I could outdrink everyone at the table,” she notes with a laugh) and is amazed that she’s satisfied after she eats. “I’m not constantly punishing myself,” she says. “I hardly recognize the woman I’ve become. But she’s a happy woman.” She told PEOPLE.
Winfrey's weight has always been a struggle for her, especially when she read painful headlines like 'Oprah - Fatter Than Ever' or 'Oprah Warned: 'Diet or Die''. In fact, in her first appearance on The Tonight Show in 1985, she was goaded into agreeing to lose 15 lbs. by hot Joan Rivers. While she became the one-name star, she always remained aware about her weight. “I’ve always been confident in whatever I was doing, but I was at the same time disappointed in my overweight body. “Was I embarrassed by it? Yes. Was I disappointed in myself for continuing to fail? Yes, every single time. I felt it was my fault,” she writes in her book, co-authored by obesity expert Dr Ania M Jastreboff: Enough: Your Health, Your Weight and What It's Like to Be Free.
She wrote that she “felt doubly shameful because I have access to so much: chefs and trainers and the healthiest of foods.”
For decades, Oprah Winfrey lived under a microscope, her body turning into both public spectacle and personal battleground. She now openly admits that while she endured relentless humiliation, she also helped normalize weight shaming herself. In 1988, she survived four months on liquid shakes alone, famously dragging a wagon filled with 67 pounds of fat onto her show to prove she could fit into size 10 jeans. Years later, she lost 20 pounds simply because Vogue suggested it before a cover shoot. At the time, it felt like willpower. In hindsight, it felt like survival.
Also Read: Australian Cricketer Damien Martyn in Hospital With Meningitis
When the Body Pushes Back
No diet or discipline seemed to last. No matter how hard she tried, her weight kept returning to 211 pounds, what experts now call a biological “set point.” Even after knee surgery in 2021, daily hikes and eating one meal a day, her body resisted. Ten-mile hikes still resulted in weight gain. The message was clear: this was not a motivation problem.
How Did GLP-1 Medication Transform Oprah Winfrey?
Everything shifted in 2023 when Winfrey hosted a special on obesity and had what she calls an epiphany. She finally understood obesity as a disease, not a personal failure. That realization cracked years of shame. GLP-1 medications, which she had earlier dismissed, suddenly felt like a medical tool rather than a moral shortcut. Starting the injections felt like relief, even a gift.
She briefly stopped the medication in early 2024, believing lifestyle changes alone might be enough. The weight returned. That’s when she accepted the truth: this would be lifelong care, not a phase. Now, she describes GLP-1 as a way to quiet the constant mental chatter around food. The “food noise” faded, replaced by calm, strength, and clarity.
Today, it’s not about a number on the scale. It’s about peace. Better health markers. Deeper relationships. Even unexpected changes, like losing interest in alcohol. Winfrey’s message is simple but radical: if obesity runs in your genes, it’s not your fault. And you deserve compassion, information, and real choices.
Trying To Get Fit In 2026? Here’s A 6-Step Weight-Loss Plan From A Fitness Coach

Credits: Canva
When it comes to losing weight, most people put all their energy into workouts and diet plans, often forgetting one crucial part of the process: mindset. How you think about fitness, food, and consistency plays a major role in whether weight loss feels like a struggle or becomes a sustainable habit. Shifting your approach can make shedding extra kilos feel more manageable and long-lasting.
If staying healthy and losing weight are the goals for the coming year, Raj Ganpath, a fitness coach with over 18 years of experience and the founder of The Quad in Chennai, shares six simple but effective principles to keep in mind. He outlined these points in an Instagram post on 29 December.
6-Step Weight-Loss Plan From A Fitness Coach
1. Eat Less
“You need to eat less,” Raj says plainly. However, he said that this does not mean starving yourself or cutting out all your favourite foods. Instead, it is about being mindful of portion sizes and recognising how often we tend to overeat without realising it. According to him, consistent overeating is one of the most common reasons people struggle to lose weight. Paying attention to how much you eat, even when the food is healthy, can make a noticeable difference over time.
2. Eat Well
Eating less alone is not enough if the quality of food is poor. Raj explains that eating well means choosing nutrient-dense foods that support your body. This includes prioritising protein, vegetables, and whole foods, while reducing items that offer little nutritional value. Sugary snacks, deep-fried foods, and heavily processed or starchy items may be comforting, but they do not help when weight loss is the goal. Making better food choices more often than not builds a strong foundation for fitness.
3. Exercise Regularly
Consistency matters more than intensity. Raj advises exercising at least three days a week, with an ideal range of five to six days if possible. The exact form of exercise is less important than showing up regularly. However, he stresses that strength training should be included at least twice a week. Building muscle supports metabolism and overall strength, making weight loss more effective and sustainable in the long run.
4. Move Often
Exercise sessions alone are not enough if the rest of the day is spent sitting. Raj encourages regular movement throughout the day, separate from structured workouts. Simple activities like walking more frequently can add up. He suggests aiming for at least 6,000 steps daily, with 8,000 or more being a better target. This kind of movement supports fat loss, improves circulation, and keeps the body active beyond the gym.
5. Sleep More
Sleep is often ignored, yet it plays a direct role in weight management. “Most of us don’t sleep enough,” Raj points out. Even going to bed 20 to 30 minutes earlier each night can help. He recommends a minimum of six hours of sleep, with seven hours being ideal. Proper rest supports hormone balance, recovery, and energy levels, all of which influence appetite, motivation, and workout performance.
6. Manage Stress
Stress is unavoidable, and Raj acknowledges that no one can live a completely stress-free life. What matters is how stress is handled. Managing stress allows you to stay consistent with healthy habits instead of turning to food, skipping workouts, or neglecting sleep. Whether it is through exercise, meditation, time outdoors, or personal downtime, finding ways to cope with stress is essential for long-term health and weight loss.
Diet And Exercise Works Together For Weight Loss
Weight loss is most effective when diet and exercise work hand in hand. Diet helps create the calorie deficit needed for fat loss, while exercise protects muscle mass, boosts metabolism, and improves heart and bone health.
Strength training is especially important because muscle burns more calories at rest. While diet controls calorie intake, exercise prevents muscle loss, which can otherwise slow metabolism. Together, they create a balanced and sustainable approach that supports lasting results, healthier habits, and reduced chances of regaining weight.
7 Science-Backed Tips For Healthy Aging, According To Cardiologist

Credits: iStock
Everyone wants to age better, look young, stay young, even at heart. Celebrities like Bryan Johnson, too is obsessed with living forever. While living forever may not be a thing now, but Dr Eric Topol, cardiologist, tells the Wall Street Journals that there are ways one could age in a healthy way.
Dr Topol wanted to see if there were in fact "super agers", people who were born with genes that would help them age better. However, the key is in how they take care of their bodies and not necessarily in the genes. Topol, who is now 70, told the publication that he is now taking his own advice on healthy aging.
Here are the 7 science-backed tips he shared:
Exercise
"I’ve always been an exercise enthusiast. As a cardiologist, I always used to think, do aerobic exercise. But all the studies show resistance or strength training is really important too," he says. As per the National Institute on Aging, US, resistance training is crucial for aging because it combats age-related muscle loss (sarcopenia), boosts metabolism, strengthens bones, improves balance, enhances cognitive function, and supports heart or metabolic health, helping older adults stay mobile, independent, and reduce disease risk, making it a powerful anti-aging strategy for body and mind.
Sleep
The doctor explains that "many people think they need eight hours of sleep. Studies show seven hours is optimum. I’ve learned how important it is to have a set and early bed time. I’ve been able to increase my average deep sleep substantially by having my data and learning how what I eat and when I exercise affect it." He says that he used Apple smartwatch to track his sleep.
Diet
The doctor shares that he is especially "religious" about reading labels on the food items he buys. “Ultra-processed foods should be reduced to the lowest amount possible. When I read labels for things like whipped cream cheese or different brands of ice cream, they are chock-full of ultra-processed ingredients,” he shares.
Read: The Longevity Diet: Bryan Johnson Eats 3 Meals In 6 Hours—With Extra Virgin Olive Oil
What can you eat? Dr Topol mostly eats salad, with oil-and-vinegar dressing, packed with protein like salmon or chicken.
Protein
The doctor says that protein is a must. He says that the dietary allowance for protein is 0.8 grams per kilogram of a person’s weight for adults. However, he does warn people against overdoing on protein intake, as studies show that very high protein diets could lead to atherosclerosis.
Testing
Repeated testing and screening is a key to lead a healthy life. “I am trying to assemble a full stack of data we all need. I have had my genome sequenced, my gut microbiome tested, I have used organ clocks...There are anywhere between 6,000 and 11,000 proteins in your blood that can tell about the aging of organs...” he says.
Daily screening also help one stay ahead of any disease, as early detection could lead to shorter span of disease and has a better recovery rate.
Aging Supplements
“I don’t think any antiaging supplements have been proven. Taurine is a possible candidate. As we age, we see lower levels of taurine in the blood, and that is correlated with more inflammation,” he says. He, however also warns that these supplements need trials.
He also warns against Rapamycin, which is an FDA approved drug. It is used to help prevent organ rejection in transplant patients by suppressing the immune system. Dr Topol points out, “the last thing you want to do as you get older is to suppress the immune system”.
Mental Health
His advice to his patient is to spend more time outdoors. He says that he too has started doing the same thing.
© 2024 Bennett, Coleman & Company Limited

