- Health Conditions A-Z
- Health & Wellness
- Nutrition
- Fitness
- Health News
- Ayurveda
- Videos
- Medicine A-Z
- Parenting
- Web Stories
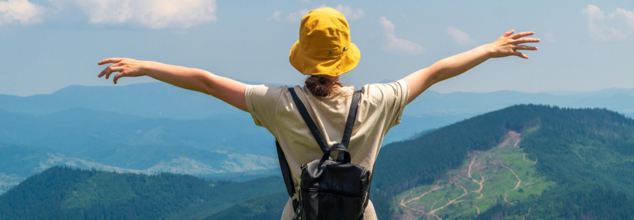
Risks Of Exercising Too Soon After Child Birth

weight loss (Credit: Canva)
After giving birth, many new mothers are eager to return to their fitness routines. However, understanding the risks of exercising too soon postpartum is crucial for a safe recovery. Traditionally, women were advised to rest for at least six weeks before engaging in any physical activity, but this guidance is increasingly seen as outdated and unhelpful for effective postnatal recovery.
Current guidelines from Chief Medical Officers suggest that if you had a straightforward birth, you can begin gentle exercises as soon as you feel ready. Activities such as pelvic floor exercises, deep core activation, walking, and breathwork can be beneficial right from the start. For those who had a cesarean section or experienced a more challenging labour, recovery may take longer, and it is essential to listen to your body and progress at your own pace.
After your six- to eight-week check-up, if you were active before giving birth, you can gradually reintroduce physical activity. However, adjustments may be necessary based on your individual circumstances. If you were not active during pregnancy, it’s vital to start slowly and build up your activity level over time. Ultimately, the goal is to work toward 150 minutes of moderate exercise per week, alongside two strength-based workouts.
Exercising too soon can pose various risks, which may depend on the type of delivery you had. For those with any form of scar—whether from an episiotomy or a cesarean—there is a potential risk of causing trauma to the scar tissue, which can hinder healing. Symptoms such as soreness, rawness, or fluid leakage from the scar necessitate immediate consultation with a healthcare professional.
Hormonal changes post-pregnancy can also affect joint stability, making new mothers more susceptible to injuries, particularly during high-impact activities. It’s advisable to avoid such exercises for at least four to five months postpartum to mitigate this risk.
For vaginal birth mothers, the risk of Pelvic Organ Prolapse (POP) can be heightened, especially with high-impact exercises. Strengthening the pelvic floor is crucial for supporting pelvic organs and managing any symptoms related to POP.
Another important consideration is the presence of lochia, a normal postpartum discharge. While it gradually decreases over time, an increase in lochia after exercise could indicate overexertion, signaling the need to scale back your activity.
Lastly, the abdominal muscles undergo significant changes during pregnancy and require time to recover postpartum. Introducing advanced abdominal workouts too early can impede the healing process of diastasis recti, a condition characterized by the separation of the abdominal muscles.
Overall, while returning to exercise is an important aspect of postpartum recovery, it’s essential to approach it with caution and awareness of your body’s needs. Prioritizing gradual progression and listening to your body can help ensure a safe and effective return to fitness.
Spent A Long Day Walking And Travelling? Essential Yoga Stretches You Must Do
(Credit-Canva)
Travelling is one of the best ways to experience new places and cultures as well as enjoy a good time. It is a great way to support your mental health. The break from your general monotonous routine helps your brain feel relaxed as well as helping ease anxiety, stress, and other day-to-day struggles. However, it is also strenuous, walking for hours or moving from one place or the other, can be mentally as well as physically taxing. After hours of walking or sitting during travel, your body can feel stiff, sore, and fatigued. So how does one tackle this?
Yoga Stretches After Travelling
Yoga is a great way to ensure you do not have to suffer muscle fatigue for days, before you feel any better. Yoga stretches are designed to target common areas of tension, helping to release discomfort, improve circulation, and re-energize you.
After a long day of walking or traveling, your body can feel stiff and tired. These yoga stretches will help release tension, improve blood flow, and re-energize your body.
Seated Cat Cow
This gentle stretch helps your spine move freely after sitting or standing still. It eases back pain and improves posture by gently arching and rounding your back. This movement also aids digestion, which can sometimes be slow during travel. It's a great way to start releasing stiffness.
Seated Spinal Twist
Twisting your spine gently helps release built-up tension in your back, especially after long trips. This pose improves how your spine moves and can soothe back aches. It also gently massages your internal organs, which can help with digestion and ease stress.
Child's Pose
This deeply calming pose is perfect for relaxing after a long day. It gently stretches your hips, thighs, and ankles, which can get tight from walking or sitting. It also eases back and neck pain and helps calm your mind, reducing stress and aiding digestion.
Downward-Facing Dog
This full-body stretch is great for waking up your body. It helps lengthen your spine and stretches tight hamstrings and calves from walking. It also strengthens your arms and core, boosts circulation, and can help reduce fatigue and clear a foggy mind.
Forward Fold
This classic stretch brings a sense of peace and helps release tension in your legs and spine. It deeply stretches your hamstrings and calves, improving overall flexibility. Folding forward also calms your mind, reduces stress, and can gently assist with digestion.
Legs Up the Wall
This relaxing pose is wonderful after being on your feet or traveling. It helps reduce swelling and tiredness in your legs by improving blood flow. It's also very calming for your nervous system, relieving tension and stress, and gently stretching your lower back and hamstrings.
Low Lunge
This pose is excellent for opening your hips and stretching the front of your thighs (hip flexors), which often get tight from sitting or walking. It improves hip movement, strengthens your legs, and can gently open your chest and shoulders, counteracting slouching from travel.
Tree Pose
This balancing pose strengthens your legs and core, while also improving your focus and stability. It's helpful after a day of varied walking surfaces or crowded places. It gently opens your hips and improves your balance and concentration, which can reduce mental tiredness.
Eagle Pose
This unique balance and twist targets your shoulders, hips, and upper back, areas that often get tight from carrying bags or awkward travel positions. It deeply stretches these areas, strengthens your ankles and calves, and boosts balance and focus. It can also help relieve leg discomfort.
How To Perfectly Do Skull Crushers?

Credit: Canva
What is your favourite arm day exercise? There's a good chance your answer is the dumbbell biceps curl. That is indeed a great answer but that excercise alone is not enough. If your goal is to build balanced arm muscle and strength, you'll want to pair your biceps work with a complimentary triceps movement. One of the best choices to do that is the skull crusher.
How To Do A Scull Crusher?
- Start by lying back on the bench. Don't arch your back—drive your shoulder blades into the bench, squeeze your abs and glutes, and keep your feet flat on the floor.
- Press the weight straight up above your chest. Your upper arm should be just past 90 degrees, at a 91 or 92 degree angle. Keep your wrists strong and a tight grip on the bar.
- Lower the weight slowly down to an inch above your forehead, moving only at the elbows. Don't allow your shoulders to shift forward; keep your upper arm still.
- Drive the weight back up (again moving only at the elbows), squeezing your triceps at the top.
- Keep these more detailed form tips from Samuel in mind during your skull crusher sets.
Here Are Few Things Your Should Know
No Arch: Maintain a sturdy body position: Feet flat on the floor, squeezing your glutes, and keep your core active so that you’re not arching your back on the bench. I know, I know; we always say you shouldn’t arch your back, but it’s more important to get the most out of the skull crusher. You want, at minimum a perpendicular upper arm angle relative to your torso; anything less than that, and your arm action misses the point of the skull crusher. If you arch your back, it’s harder to find that proper angle.
Shoulder Position: Once you have the bar over your head, drive your shoulders aggressively into the bench and maintain a little bit of tension in your mid-back. Then lean your upper arms back just slightly. Typically, you’ll see people aim to keep their upper arms perpendicular to the floor; I want you to be at a 91- or 92-degree angle instead. That slight shift places more tension on the triceps when you straighten your arms and prevents the straight-armed position from being a position of rest. Now you need to fully flex your triceps to maintain straight arms.
Elbows Tight: As you lower the weight, work to keep your elbows in. Your elbows and wrists should both be shoulder-width apart; not closer or farther apart. It’s common for people to let their elbows flare out as they’re doing skull crushers; avoid this. That’s a good way to injure your shoulders and it also takes emphasis off your triceps, diminishing the effectiveness of the move.
One Lever Only: Once you’ve gotten into this position, lower the bar to your head, moving only at the elbow joint. It’s tempting to let your upper arms roll back as you lower the bar toward your forehead, then shift your upper arms forward as you drive the weight back up, but that takes emphasis off your triceps and gets your lats involved. You’re aiming to move only at the elbows, maximizing the work your tris have to do.
Muscles Worked By Skull Crusher
The skull crusher is all about the triceps. The three-headed muscle, located on the back side of your arm, is the biggest muscle on the limb, making it an essential point of focus if you want to grow those guns. The name of the movement comes from the slightly precarious position you put yourself in to pull it off, isolating the muscles and moving the weight up and down directly above your head.
Benefits of Skull Crusher
The best triceps exercises put you in a good position to make use of the muscles' primary function: extension of the elbows. There are few better (or tougher sounding) moves to do this than the skull crusher. If you work with proper form, you'll isolate the muscles so that you're focused on only elbow extension. This will make your triceps stronger—which is essential for compound pushing exercises like the bench press—and spur muscle growth, too.
What Equipment You Need for Skull Crushers
The exercise is also fairly adaptable to the gear you have on hand. You can use dumbbells, a standard barbell, EZ bars, cable machines, and even your bodyweight to do skull crushers. For most of these variations you'll also need a bench, although you can perform the exercise prone on the ground, too. If you're low on equipment, you can do a bodyweight variation of the skull crusher that will provide the same type of triceps isolation, sans weights.
5 Easy Home HIIT Workouts That You Can Do
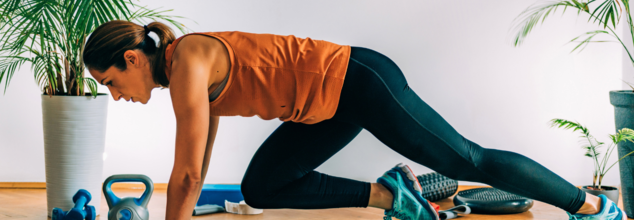
Credits: Canva
Even at the age of 51, actress, model, dancer, Malaika Arora is still the epitome of fitness. She does not let her age define her fitness routine and always stays on top of the fitness game. How does she manage to do all that? The answer lies in a recent Instagram video that she shared, captioned, "Burn fat, build fire".
In that video, she shared some quick, at-home HIIT (High-Intensity Interval Training) workouts that can help burn fat and also improve muscle mass.
While the video features exercises like burpees, around the world with a dumbbell, ballistic rows, boxing punches with props, and standing oblique crunch with a dumbbell. There are other home HIIT workouts you can try which do not require you to use weights or any props.
Here's what you can do:
Jump Squats
It is a bodyweight move using explosive plyometric power. Many muscles are at work when you do a jump squat, especially your leg muscles, quadriceps, hamstrings, glutes, calves, and core muscles.
You can stand with feet shoulder width apart and knees slightly bent. Then bend your knees into a full squat. Ensure to ensure your muscles to push your body off the floor and extend through your legs. Your feet will be a few inches off the floor and now descend and control your landing. Come back into a descending squat again. Repeat.
Mountain Climbers
Mountain climbers are a high-intensity exercise that targets your core, shoulders, and legs.
To perform mountain climbers, start in a plank position. Bring your right knee towards your chest, then quickly switch legs and bring your left knee towards your chest. Continue alternating legs as quickly as you can. Mountain climbers are a great exercise for improving your cardiovascular fitness, core strength, and coordination.
Glute Bridges
A glute bridge is used to activate your glutes and increase your core stability. It also helps with back pain.
Lie on your back. Bend your knees and keep your feet flat on the floor, about shoulder-width apart. Your toes should point straight ahead, and your heels should be about 6–8 inches away from your hips. Rest your arms by your sides with your palms facing up. Slowly lift your hips off the ground. Tighten your glutes (butt muscles) and abs as you do this. Don’t let your back arch. Keep lifting your hips until your body forms a straight line from your shoulders to your knees. At the top, squeeze your glutes tightly and hold for a few seconds. Slowly lower your hips back down, keeping your abs and glutes tight the whole time.
Plank Shoulder Taps
It helps to stabilize your whole body and also targets your core and shoulders without straining your spine.
You can start in a plank position. Ensure that your wrists are under your shoulders and your feet is hip-width apart. Touch your left shoulder with your right hand and come back into a plank position. Do the same to the other side and then repeat.
High Knees
The weighted high knee exercise is one of the finest ways to prevent falls. Strength coaches and physical therapists suggest this is a cardio-intensive activity that increases cardiovascular endurance and heart rate. Additionally, it enhances circulation and fortifies the heart.
The high knee exercise also improves balance and strength, all of which are critical for preventing falls as you age.
To improve your balance, begin the high knee exercise without any weights. Feel the earth beneath both feet while standing with your feet hip-width apart (if you're not using weights, you can stand barefoot). As you bend your right knee, shift your weight to your left foot and use the muscles in your left leg. Use a countertop or wall for balance if needed.
To engage your left leg and hip, raise your right thigh until it is parallel to the floor and plant your left foot firmly. Keeping your right thigh horizontal, apply light pressure with your right hand to increase resistance. You might sense that your core is stabilizing you. After a few seconds of holding, switch legs. For each leg, aim for 12 repetitions.
Add dumbbells to make it more difficult.
- Follow Us :


© 2024 Bennett, Coleman & Company Limited