- Health Conditions A-Z
- Health & Wellness
- Nutrition
- Fitness
- Health News
- Ayurveda
- Videos
- Medicine A-Z
- Parenting
- Web Stories
What Does It Mean When You Have Pain On The Lower Outside Part Of The Knee?

Lateral Knee Pain (Credit-Canva)
Imagine a runner who has been training for a marathon. They've been increasing their mileage and intensity, but lately, they've started to experience pain on the outer side of their knee. This is a common symptom of outer knee pain, which can be caused by overuse and inflammation of the IT band. If the pain persists or worsens, they should consider consulting a healthcare professional to get a proper diagnosis and treatment plan. Lateral knee pain, a common ailment, often manifests as discomfort on the outer side of the knee. This pain can arise from various causes, including injuries, arthritis, or inflammation of the iliotibial (IT) band, a tough tissue running along the outside of the thigh.
According to the National Library Of Medicine, distance runners frequently experience lateral knee pain due to repetitive stress on the knee joint. Additionally, injuries involving twisting or bending the knee can also trigger this condition.
Knee pain can significantly impact daily activities and quality of life. Treatment approaches vary depending on the underlying cause and severity of symptoms. In most cases, conservative treatments, such as rest, ice, compression, and elevation (RICE), physical therapy, and medication, are effective. However, for severe cases, surgical intervention may be necessary.
What is Lateral Knee Pain?
According to Musculoskeletal Matters National Health Services UK Lateral knee pain, often referred to as "Runner's Knee," is a common condition caused by the irritation of the iliotibial (IT) band. This thick band of tissue runs along the outside of the thigh, connecting the hip to the knee. When the IT band rubs against the knee joint, it can cause pain and inflammation, particularly during activities that involve repetitive knee bending and straightening, such as running or cycling. As the IT band becomes inflamed, the pain can worsen with activity and subside with rest.
Managing Lateral Knee Pain
The above source also tells us how to better the issue. To manage lateral knee pain, a multi-faceted approach is often recommended. Initially, rest, ice, compression, and elevation (RICE) can help reduce pain and swelling. Over-the-counter pain relievers like paracetamol or ibuprofen can also alleviate discomfort.
Physical Therapy plays a crucial role in recovery. Stretching exercises can help improve flexibility and reduce tightness in the IT band and surrounding muscles. These may include.
Iliotibial Band Stretch
Stand near a wall, cross one leg behind the other, and lean into the wall, feeling a stretch along the outside of the leg.
Hamstring Stretch
Stand with one leg extended behind you, keeping your back straight. Lean forward, feeling a stretch in the back of your thigh.
Quadriceps Stretch
Stand facing a wall, lean back, and grab your ankle, pulling your heel towards your buttocks.
Knee Extensions
Sit on a chair and slowly extend your knee, holding the position for a few seconds.
Squats
Stand with feet shoulder-width apart, lower your body as if sitting in a chair, and then return to the starting position.
Single-Leg Squats
Stand on one leg and slowly lower your body, maintaining balance.
Working Out These 5 Zones Can Help Older Adults Stay Fit, According To Fitness Expert
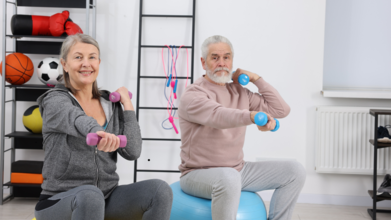
Credits: Canva
Strength training becomes increasingly important as people age, but many older adults make the mistake of training only the muscles they see in the mirror. According to Marfred Suazo, a New York City, based fitness professional known as “Fonz the Trainer,” who spoke to Fox News, targeting overlooked muscle groups is the key to moving well, staying pain-free, and living independently.
Suazo, who has trained thousands of seniors, shared with Fox News Digital which areas of the body matter most as we get older, and why focusing on them builds true longevity.
Moving Beyond “Mirror Training”
“Most people train what they see in the mirror, chest, arms, quads, and maybe abs if they’re feeling ambitious,” Suazo told Fox News Digital. “That’s what I call mirror training.”
While this type of workout may boost appearance, Suazo explained it leaves people unbalanced, with rounded shoulders, tight chests, and sore backs or knees.
“If you want to age strong, pain-free, and confident, you need non-mirror training,” he said. “That means working the muscles you don’t see but feel every single day.”
Zone 1: Power Zone — Glutes and Hamstrings
These muscles form the foundation of movement, helping with sitting, standing, climbing, and protecting the lower back.
“Your glutes and hamstrings give you the power to move with confidence,” Suazo said. He recommends deadlifts, hip thrusts, and single-leg bridges. “Control the movement, squeeze at the top, that’s where the real work happens.”
Zone 2: Posture Zone — Upper and Mid-Back
Strengthening the back keeps the body upright and breathing freely. Without it, posture often collapses into a slouch as people age.
“A strong back pulls your shoulders into alignment,” Suazo explained. His go-to moves include bent-over rows, cable rows, and bodyweight rows. “Pull through the elbows and picture yourself standing taller with every rep.”
Zone 3: Stability Zone — Core and Obliques
The core isn’t just about six-pack abs, it’s about stability and spine protection.
“True core training teaches your body to brace and protect your back during daily life,” Suazo said. His favorite move is the Paloff press: anchor a band, press it straight out, and resist rotation. “It’s simple, but it trains real-world stability.”
Zone 4: Mobility Zone — Shoulders and Rotator Cuff
Shoulders are involved in almost every upper-body movement. When they’re weak or stiff, everything else suffers.
“Healthy shoulders are a must if you want to keep training for decades,” Suazo told Fox News Digital. He suggests face pulls, rear delt flies, band rotations, and controlled overhead presses. “This combination keeps shoulders strong and mobile.”
Zone 5: Grip Zone — Hands and Forearms
Grip strength is directly linked to independence as people age, yet it’s often one of the first things to decline.
“Grip strength makes a difference in every other lift and in everyday tasks,” Suazo said. He recommends farmer’s carries — aiming to carry about 70% of body weight in total — as well as simple hangs from a pull-up bar.
A Simple Routine to Start
For beginners, Suazo suggests a quick non-mirror workout:
- 3 sets of 8–10 deadlifts
- 3 sets of 10 Paloff presses per side
- 3 farmer’s carries for 30–45 seconds each
- A short walk to finish
- Training for Longevity, Not Just Looks
Suazo emphasized that safety and form come first, especially for older adults. “Controlled movement matters more than how heavy you go,” he said. Warming up, progressing gradually, and listening to the body are essential.
“Non-mirror training is how you stay strong, upright, and pain-free,” Suazo added. “When you train the muscles behind you, the ones in front look and perform better too.”
Fitness Coach Reveals 7 'Cheat Codes' That Help You Burn More Calories While Walking
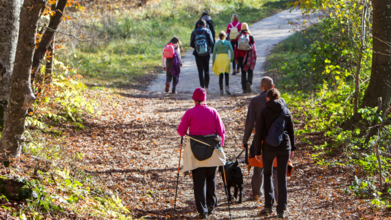
(Credit- Canva)
What is an exercise that not only needs minimal equipment, but is also the most accessible for everyone, no matter how young or old they are? It is walking. Not just by fitness coaches, but also healthcare professionals, walking is regarded as one of the best ways to stay fit and healthy.
If you are looking to lose weight, but are worried about committing to a gym membership that you may not be able to finish, then you do not need to worry about elaborate home workouts, all you need is a pair of shoes and time to take a powerful stroll. But did you know, you could maximize this time and make your walking more efficient? Not only will this allow you to make the most of your time, but it will also help you lose weight easier?
According to fitness coach Dan Go, you can make your walks far more effective. He's developed a set of simple "cheat codes" that can help you burn more fat, significantly boost your energy levels, and even add years to your life. It's often seen as a simple, low-impact activity, that is easy to adjust to your levels of fitness. These small adjustments to your walking routine can lead to truly massive results.
7 Walking Tricks To Help You Lose Weight
Japanese Interval Walking
Forget boring, steady walks. This method involves a powerful rhythm: walk fast for three minutes, then slow for three minutes. Repeat this for 30 minutes. This style of walking is scientifically proven to burn more fat and significantly boost your fitness more effectively than a constant pace.
Walk on an Incline
Adding an incline to your walk, either on a treadmill or a hill, dramatically increases your calorie burn. A 5% incline can boost your burn by 50%, and a 10% incline can double it. It’s also gentler on your joints and works your glutes and hips more.
Walk After Meals
Just a short 2-5 minute walk after eating can make a huge difference. This simple habit helps lower blood sugar spikes by about 30%, which means you'll have fewer cravings, steadier energy, and your body will be less likely to store fat.
Try a Fasted Morning Walk
Walk before you have breakfast. When you walk on an empty stomach, your body is more likely to use stored fat for energy. Doing this outside also helps set your natural body clock and gives you a refreshing boost to start your day.
Walk While You Work
For those with a busy schedule, a treadmill desk is a fantastic solution. You can get in thousands of steps while you're at your standing desk. This lets you multitask and be active during meetings or while you're working on tasks.
Pyramid Walking Intervals
This method is a great way to improve endurance and burn fat. Start with an easy 5-minute warm-up, then gradually increase your speed and incline every 10 minutes. Finish with a four-minute push at your toughest pace before a cooldown.
Rucking
Turn your walk into a full-body workout by wearing a backpack with 5-10% of your body weight. This simple addition helps you burn more calories, while also strengthening your legs, core, and bones simultaneously for a more challenging and effective walk.
Can Leg Workouts Help Protect Your Brain From Ageing? Expert Weighs In
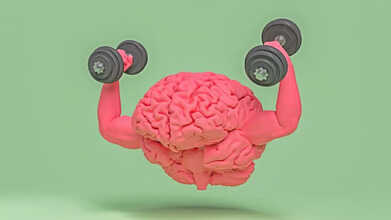
Credits: Canva
If staying sharp as you grow older is the goal, skipping leg day may not be the best idea. New findings suggest that your brain could benefit just as much as your body from squats and lunges.
A long-term study, first published in Gerontology by Karger Publishers, tracked older female twins for ten years to explore the link between leg strength and cognitive health. The results were clear: participants with stronger legs at the beginning of the study experienced far slower cognitive decline than those with weaker leg muscles.
To understand this connection better, we spoke with Dr. Indramani Upadhyay, MPT (Ortho), HOD – The Center for Knee & Hip Care, Vaishali, Ghaziabad, who shared his insights on the subject.
The Leg–Brain Connection
When we think about keeping the mind sharp, the usual suggestions include solving puzzles, reading, or practicing meditation. Yet growing research shows that one of the strongest ways to support brain health actually starts with the legs. As per Dr Upadhyay, strong leg muscles do more than keep us steady, they play a vital role in protecting memory, learning, and overall cognitive function.
Because the leg muscles are the largest in the body, every time they are put to work they send powerful signals that influence brain chemistry, circulation, and even the growth of new cells. Studies highlight several key benefits:
- Better blood flow: Leg-focused exercises improve circulation, delivering oxygen and nutrients the brain relies on.
- Myokine release: Contracting muscles release proteins known as myokines, which travel through the bloodstream and support nerve health and brain adaptability.
- Neurogenesis boost: Weight-bearing moves like squats and lunges may encourage the growth of new neurons in the hippocampus, the region responsible for memory and learning.
- Stress balance: Physical activity in the legs helps regulate hormones, easing inflammation and reducing stress—two major factors linked to cognitive decline.
Which Leg Exercises Boost Brain Health?
Dr Indramani explains that keeping your legs active does far more than build strength or tone muscles, it also supports brain health. Here are some of the most effective exercises:
1. Strength Training (Squats, Lunges, Step-Ups)
Movements that use your body weight or added resistance work the largest muscle groups in the legs. These exercises not only build muscle and protect bone health, but they also trigger the release of growth factors that sharpen memory and learning.
2. Walking and Jogging
Brisk walking or light jogging are simple yet powerful ways to improve cardiovascular fitness. Better circulation means more oxygen-rich blood reaches the brain. Walking outdoors adds even more value by lowering stress and boosting focus.
3. Cycling
Whether on a road bike or a stationary one, pedaling engages the legs continuously, keeping endurance and blood flow steady. Research links cycling to better reaction times, sharper executive function, and a lower risk of age-related cognitive decline.
ALSO READ: Ebola Outbreak: Why African Countries Are Disproportionately Impacted By The Disease?
4. Yoga Poses (Tree, Chair, Warrior Stances)
Balance-focused yoga postures recruit the legs while also improving flexibility and coordination. This mindful movement helps ease anxiety, sharpen concentration, and strengthen the mind-body connection.
Putting It All Together
The most effective routine is a balanced one: strength training two to three times a week, daily walking or cycling, and yoga for flexibility and balance. Together, they create a foundation that protects both body and brain.
Your legs are more than just a means of movement. They are engines that power your mental resilience. Keeping them strong is an investment not only in mobility but also in memory, focus, and long-term brain health.
- Follow Us :


© 2024 Bennett, Coleman & Company Limited