- Health Conditions A-Z
- Health & Wellness
- Nutrition
- Fitness
- Health News
- Ayurveda
- Videos
- Medicine A-Z
- Parenting
- Web Stories
5 Easy Home HIIT Workouts That You Can Do
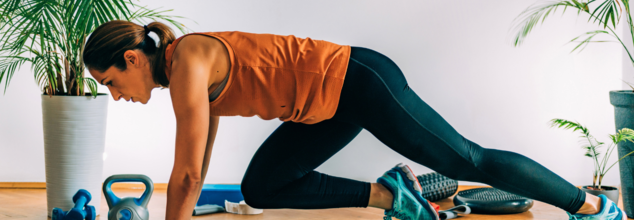
Credits: Canva
Even at the age of 51, actress, model, dancer, Malaika Arora is still the epitome of fitness. She does not let her age define her fitness routine and always stays on top of the fitness game. How does she manage to do all that? The answer lies in a recent Instagram video that she shared, captioned, "Burn fat, build fire".
In that video, she shared some quick, at-home HIIT (High-Intensity Interval Training) workouts that can help burn fat and also improve muscle mass.
While the video features exercises like burpees, around the world with a dumbbell, ballistic rows, boxing punches with props, and standing oblique crunch with a dumbbell. There are other home HIIT workouts you can try which do not require you to use weights or any props.
Here's what you can do:
Jump Squats
It is a bodyweight move using explosive plyometric power. Many muscles are at work when you do a jump squat, especially your leg muscles, quadriceps, hamstrings, glutes, calves, and core muscles.
You can stand with feet shoulder width apart and knees slightly bent. Then bend your knees into a full squat. Ensure to ensure your muscles to push your body off the floor and extend through your legs. Your feet will be a few inches off the floor and now descend and control your landing. Come back into a descending squat again. Repeat.
Mountain Climbers
Mountain climbers are a high-intensity exercise that targets your core, shoulders, and legs.
To perform mountain climbers, start in a plank position. Bring your right knee towards your chest, then quickly switch legs and bring your left knee towards your chest. Continue alternating legs as quickly as you can. Mountain climbers are a great exercise for improving your cardiovascular fitness, core strength, and coordination.
Glute Bridges
A glute bridge is used to activate your glutes and increase your core stability. It also helps with back pain.
Lie on your back. Bend your knees and keep your feet flat on the floor, about shoulder-width apart. Your toes should point straight ahead, and your heels should be about 6–8 inches away from your hips. Rest your arms by your sides with your palms facing up. Slowly lift your hips off the ground. Tighten your glutes (butt muscles) and abs as you do this. Don’t let your back arch. Keep lifting your hips until your body forms a straight line from your shoulders to your knees. At the top, squeeze your glutes tightly and hold for a few seconds. Slowly lower your hips back down, keeping your abs and glutes tight the whole time.
Plank Shoulder Taps
It helps to stabilize your whole body and also targets your core and shoulders without straining your spine.
You can start in a plank position. Ensure that your wrists are under your shoulders and your feet is hip-width apart. Touch your left shoulder with your right hand and come back into a plank position. Do the same to the other side and then repeat.
High Knees
The weighted high knee exercise is one of the finest ways to prevent falls. Strength coaches and physical therapists suggest this is a cardio-intensive activity that increases cardiovascular endurance and heart rate. Additionally, it enhances circulation and fortifies the heart.
The high knee exercise also improves balance and strength, all of which are critical for preventing falls as you age.
To improve your balance, begin the high knee exercise without any weights. Feel the earth beneath both feet while standing with your feet hip-width apart (if you're not using weights, you can stand barefoot). As you bend your right knee, shift your weight to your left foot and use the muscles in your left leg. Use a countertop or wall for balance if needed.
To engage your left leg and hip, raise your right thigh until it is parallel to the floor and plant your left foot firmly. Keeping your right thigh horizontal, apply light pressure with your right hand to increase resistance. You might sense that your core is stabilizing you. After a few seconds of holding, switch legs. For each leg, aim for 12 repetitions.
Add dumbbells to make it more difficult.
Exercising Can Shrink Cancer Cells: Study Reveals Which Sport Protects You the Most
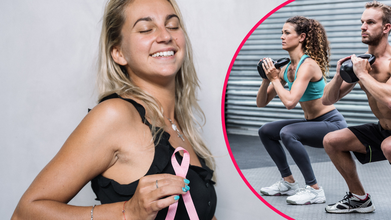
(Credit- Canva)
Cancer affects millions of people worldwide. No matter how careful you are or how healthily you live, cancer may catch you with you sooner or later. Breast cancer is the one of the leading causes of death in women and it was estimated to have caused 670,000 deaths globally and it also the most unpredictable. While there has been research done on it, according to the World Health Organization, half of the breast cancer occurs in women with no specific risk factor other than sex and age.
However, rehabilitation is also very possible, and many people have beaten the odds by surviving breast cancer. When someone goes into cancer remission, they are given some specific treatments so that the cancer does not come back. However, many times it is not as effective.
To find out better ways to keep cancer away, researchers looked into exercising, and focused one fitness program that could prove useful.
The August 2025 study, published in Breast Cancer Research and Treatment journal, suggests that exercising may directly help suppress the growth of breast cancer cells. The research involved 32 women who'd survived breast cancer and found that a single session of high-intensity interval training (HIIT) or weightlifting changed their body's chemistry.
Afterward, their blood contained higher levels of certain molecules that helped put the brakes on laboratory-grown breast cancer cells. This research adds to growing evidence that exercise is a powerful tool for cancer survivors.
How Exercise Works Against Cancer
For years, doctors have known that cancer survivors who exercise are less likely to have their cancer return. This new study helps explain why. When we use our muscles, they release special hormones and biochemicals called myokines into our bloodstream. These myokines are believed to be the body’s natural cancer fighters. In the study, blood taken from the women after they exercised was added to live cancer cells in a lab. The results were clear: the blood from both groups reduced cancer cell growth by 19% to 29%.
What Kind of Exercise is Best For Breast Cancer?
The study compared two types of workouts: HIIT and weightlifting. Both helped, but the blood from the women who did HIIT had a greater effect on the cancer cells, reducing their growth more significantly. This suggests that more strenuous, high-intensity workouts may be more effective at releasing the beneficial myokines, especially a key protein called IL-6. The study found that IL-6 levels were significantly higher in the HIIT group immediately after their workout.
This research has major implications for how we view exercise. It’s no longer just a "nice thing to do" to feel better; it's increasingly being recognized as a powerful tool in cancer treatment. The study's authors believe exercise could be a "first-line treatment" in its own right, alongside traditional therapies like chemotherapy and radiation. If you are a cancer survivor, you should talk to your oncologist before starting a new workout routine, but this study offers a hopeful message that working out can be a simple, accessible, and effective way to improve your health and cut the risk of cancer returning.
Following Japanese Ancient Samurai Routine Could Reduce Risk Of Falls In Seniors
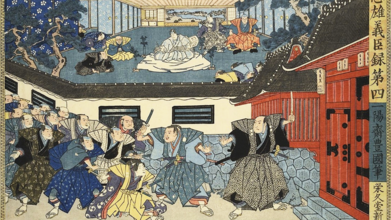
Credits: Canva
Ancient Japanese samurai were known for their discipline, precision, and ritualized approach to life. Now, researchers suggest that their deliberate movements may offer a surprising benefit for modern-day seniors, helping them stay strong, steady, and less prone to falls.
Ancient Samurai Practice Meets Modern Science
A randomized controlled trial from Tohoku University in Japan explored the benefits of Rei-ho, an ancient mindful practice of physical etiquette that involves slow, precise movements like sitting, standing, and walking. The findings were published in the Tohoku Journal of Experimental Medicine. Researchers found that just five minutes of Rei-ho a day can significantly improve knee strength, a crucial factor for mobility and fall prevention in older adults.
"Knee extension strength, the force used to straighten the knees, is a key measure of mobility and daily functioning," explains exercise physiologist Ayaka Ogasawara. "These exciting results suggest that Rei-ho may help seniors maintain their independence."
The Study: Small Effort, Big Gains
Researchers recruited 34 healthy adults over the age of 20, all with no prior experience in Rei-ho. Participants were split into two groups, one group continued their usual daily activities, while the other practiced 20 to 22 Rei-ho squats and sit-to-stand exercises for five minutes a day, four days a week.
After three months, the results were striking. The Rei-ho group showed a 25.9% increase in knee extension strength, compared to just 2.5% in the control group. Such a dramatic improvement in such a short time is encouraging, particularly since stronger knees are linked to better balance and a lower risk of falls.
Although the participants were not seniors, the researchers believe the results could be even more beneficial for older adults, whose lower-limb strength tends to decline more rapidly with age.
Why Lower-Body Strength Matters
As we age, muscle mass and strength naturally decline, a condition known as sarcopenia. This loss is most pronounced in the lower body, which can lead to frailty, poor balance, and an increased risk of falls.
"In recent years, the decline in muscle strength and physical fitness has become a significant public health concern," the researchers write. "The problem is worsened by sedentary lifestyles, making it all the more important to find simple, low-risk interventions that work."
Rei-ho fits the bill perfectly. It uses only body weight, involves slow, controlled motions, and minimizes the risk of injury or spikes in blood pressure that can occur with more intense workouts.
More Than Just Exercise: A Cultural Connection
This is not the first time ancient practices have been found to benefit modern health. Traditional martial arts, yoga, and tai chi have all been linked to improvements in strength, flexibility, and mental focus.
"We think it’s valuable that people outside Japan who want to try Rei-ho would not only improve their health but also experience a unique part of Japanese tradition," says exercise physiologist Akira Sato.
While the study was relatively small and relied on participants to practice without supervision, the findings are promising. For seniors looking for a simple, low-impact way to protect their mobility, Rei-ho offers a unique blend of mindful movement and functional strength training.
In just five minutes a day, following the deliberate movements inspired by samurai tradition might help keep knees strong, reduce fall risk, and allow older adults to stay active and independent for longer.
The Simple Exercise That Helps Regrow Brain Cells, According To Neuroscientist
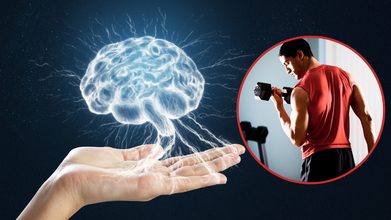
(Credit- Canva)
A medical fact you may have heard of regarding your brain health is that you cannot biologically regrow more brain cells. Many times, we were told that your brain cells cannot grow back once they are lost whether in an accident or however, turned fact was proven otherwise by many studies. These studies showed that your brain keeps growing new neurons even in old age. However, do you know one thing that can make this growth even better?
It's long been known that exercise is good for your body, but it's also a powerful tool for your brain. When you work out, your muscles release a special chemical called BDNF, which stands for Brain-Derived Neurotrophic Factor.
In a recent video Robert W.B. Love, a neuroscientist, specializing in helping people prevent Alzheimer’s disease, he explained how Dr. Elizabeth Gould, a neuroscientist at Princeton, confirmed this by publishing studies showing that adult mammals can produce new brain cells in the hippocampus, the brain's memory center. As such there are also exercises that can help you better your BDNF.
Think of BDNF as a kind of fertilizer for your brain. It helps new brain cells and new connections between them grow and get stronger. By getting your muscles moving, you can boost the levels of BDNF throughout your body and directly in your brain, helping to keep it healthy and sharp as you age.
What is the Best Exercise for Brain Health
While all forms of exercise are great, new research suggests that resistance training, or weightlifting, is particularly effective. At a recent conference on aging, it was shared that this type of exercise releases the highest amount of BDNF compared to other exercises like running or cycling.
Having higher levels of BDNF in your body is linked to a lower risk of all kinds of diseases. It also supports healthy brain function and helps you age better. So, if you want to give your brain the biggest boost from exercise, start incorporating some form of resistance training into your routine.
Getting Started with Resistance Training
You don't need a gym membership to start doing resistance training. You can use simple exercises with your own body weight. For example, you can do squats, which are great for your legs, or push-ups, which work your arms and chest.
The main idea is to use your muscles by pushing or pulling against something. If you're new to this kind of exercise, it's a good idea to work with a coach or a trainer to make sure you're doing the moves safely and correctly. This will help you get the maximum benefit while preventing any injuries. Here are some exercises you can do at home according to British Heart Fedaration.
How to Get Started
To get the most out of strength training, experts recommend doing it at least twice a week, with at least one full day of rest in between sessions. These exercises should be done in addition to 150 minutes of moderate aerobic activity per week, like brisk walking.
Heel Raises
Stand and lift your heels off the floor, balancing on your toes, then slowly lower them back down.
Sit-to-Stand
Stand up slowly from a sturdy chair, then gradually sit back down without using your hands.
Standing Side Leg Lifts
Lift one leg out to the side while keeping your body straight, then slowly return it to the center.
Split Squats
With one foot behind you, bend your front knee to lower your body toward the floor.
Glute Bridges
Lie on your back with your knees bent and feet flat, then lift your hips off the floor.
Seated Forward Punches
While sitting, make fists and punch one arm forward at a time, alternating arms.
Seated Biceps Curls
Sit straight and bend your elbows to bring your hands toward your shoulders, then lower them back down.
Seated Upright Rows
Sit straight and lift your elbows up and out to the sides, as if lifting a shopping bag.
Chair Dips
Sit on the edge of a chair, place your hands on the seat, and lower your body a few inches before pushing back up.
Wall Push-ups
Stand facing a wall, place your hands on it, and lean your body in toward the wall by bending your elbows.
- Follow Us :


© 2024 Bennett, Coleman & Company Limited