- Health Conditions A-Z
- Health & Wellness
- Nutrition
- Fitness
- Health News
- Ayurveda
- Videos
- Medicine A-Z
- Parenting
Workout Plan To Know Which Muscle Groups To Train On The Same Day

Workout Plan To Know Which Muscle Groups To Train On The Same Day
Its become very easy and convenient to simply read up about how to build muscles and workout because of the internet and especially social media. But it often does not provides every bit of advice on targeting individual muscle groups maximally for maximum muscle gains. Many people, being very new to training, experience confusion in the process because not everyone trains all muscle groups in one workout.
When should I train certain muscle groups together? What is the best strategy to ensure balanced growth? To answer these questions, several factors must be taken into account, such as how many days a week you can dedicate to the gym, your fitness goals, the type of exercises you enjoy, and your overall training intensity.
In this guide, we will help you devise an effective workout split. A well-thought-out workout plan addresses these considerations and focuses on proper muscle recovery, maximization of performance, and achievement of optimal results.
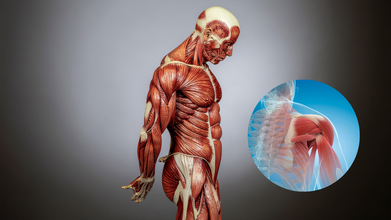
Your body consists of over 600 muscles, all of which have an integral role in making you perform physical activities. To effectively train, most fitness professionals categorize these muscles into different groups based on function. Broadly, there are three categories of muscle groups: major, secondary, and minor.
Major Muscle Groups
These muscles are the drivers of most of your movements. They are larger and take up more energy and time for recovery. The major muscle groups include:
- Chest: Pectorals (pectoralis major and minor)
- Back: Latissimus dorsi (lats) and rhomboids
- Legs: Quads, hamstrings, glutes
- Secondary/Accessory Muscle Groups:
- These muscles support the major muscles in movements and frequently contribute to stability and control during exercises. They include:
- Shoulders: Deltoids
- Triceps: Triceps brachii
- Biceps: Biceps brachii
- Core Muscles: Abs, obliques, lower back
Minor Muscle Groups
These minor muscles are recruited during compound exercises and support stability. Some of the minor muscle groups are:
- Forearms: Flexors and extensors
- Calves: Gastrocnemius and soleus
- Traps: Trapezius
Why Workouts Should be Split
Having gained an overview of the muscle groups, the question that comes to mind is how these muscle groups are to be split up for a workout routine.
This is a choice made according to your desired outcomes in training, gym time available, and your training preference. There are many ways to structure muscle groups for optimal growth; one of the most common is using a workout split. Workouts split your training sessions into different days and combinations of muscle groups to effectively target various parts of your body.
Full-Body Workout Split
A full-body workout split involves exercising all the major muscle groups in each training session. Such a workout routine is particularly ideal for beginners and general fitness with some muscle tone in the body. During the full-body workout, exercise usually involves more significant muscle groups and includes movements like row variations:
Back (rows dumbbell, rows barbells) and horizontal presses that involve chest movements, such as bench press or chest press.
Lower Body Exercise: Engage legs-squats, lunges
Generally, full-body workouts will be done at least several times a week. Ideally speaking, this will be around 2-3 times because it will make sure all muscles get that attention and time for recovery. Because it hits every major muscle group per session, the full-body split is excellent for athletes who want to create a sound base of strength and muscle building.
Push/Pull/Legs Split
The push/pull/legs workout split is a more complex method where muscles are arranged according to their movement patterns. This split allows you to train different muscle groups on the same day while ensuring adequate rest for other muscle groups. The split divides the body as follows:
Push Movements: These exercises work the chest, shoulders, and triceps. Examples include overhead presses, push-ups, and tricep extensions.
Pull Movements: These exercises target the back (lats, traps, rhomboids), biceps, and forearms. The most common pull exercises are pull-ups, rows, and bicep curls.
Leg Movements: These target the lower body, mainly quads, hamstrings, and glutes. The most common exercises are squats, deadlifts, and lunges.
This split will allow you to train 3-4 times a week and is great for intermediate and advanced lifters looking to boost strength and hypertrophy in a more focused manner.
Upper/Lower Split
Another common workout split is the upper/lower split, where the upper body (chest, back, shoulders, arms) is trained on one day and the lower body (legs, calves) on another. This is good for intermediate lifters who want to maximize recovery while working both the upper and lower body more frequently. The upper/lower split allows for more volume per muscle group while giving adequate time for recovery.
Bro Split
Popularized by bodybuilders, the bro split is a classic workout plan in which one or two muscle groups are targeted per session. One day may be chest, another back, and another legs. Though this split can work for hypertrophy, it usually best fits the more experienced lifter who has time and recovery capacity to train more frequently.
Choosing Exercises for Each Muscle Group
In any workout split, it’s important to understand the basic movement patterns that your body uses to train each muscle group. These movement patterns guide the selection of exercises for your training plan.
- Pushing Movements: These exercises engage the chest, shoulders, and triceps. Examples include bench presses, push-ups, and tricep extensions.
- Pulling Movements: These target the back, traps, biceps, and forearms. Pull-ups, rows, and curls are common pulling exercises.
- Squatting Movements : In terms of squats, it's primarily engaging with the legs, using muscles like quads, hamstrings, and glutes.
Deadlifts and swing motion, involving kettle bells can be hinging movements and generally engage with the hamstrings, glutes, lower back, etc.
Sets, Reps, and Recovery
The number of sets and reps is a crucial factor in optimizing muscle growth. According to research, 20-30 sets per muscle group per week is ideal for muscle growth. However, the quality of each set should be emphasized rather than just the quantity. Each set should be done to within 3 reps of failure to stimulate muscle hypertrophy effectively.
For muscle recovery, ensure you’re giving each muscle group enough time to rest between workouts. While training frequency will depend on your workout split, adequate rest is essential for muscle repair and growth.
Designing a workout plan that targets the right muscle groups on the same day is an essential part of building muscle and improving overall fitness.
Whether you opt for a full-body workout, push/pull/legs split, or upper/lower split, the main thing is to train all the major muscle groups while allowing for proper recovery. With the right combination of exercises, sets, and recovery, you will see noticeable gains in strength, muscle mass, and overall performance. Always listen to your body, make adjustments as necessary, and most importantly, stay consistent in your training routine.
India For The First Time Has Guidelines On Muscle Loss
Credits: Canva
Mobility and independence are two things that keep people healthy, however, with age, as bones weaken and muscle is lost, elderly become more dependent. This condition is called sarcopenia, or age-related muscle loss. India is finally focusing on this and have now new guidelines to warn people against it.
The Geriatric Society of India released country's first 'Indian Guidelines for the Evaluation and Management of Sarcopenia'. These guidelines are a combination of recommendations by experts across multiple specialties, including geriatric medicine, orthopedics, endocrinology, physiotherapy and nutrition. These guidelines aim to help doctors detect and treat muscle loss early. The aim is to not let elderly compromise with their independence.
Also Read: Bruce Willis Health Update: His Death News Is A Hoax; 'He's Still Alive And Well'
What Is Sarcopenia?
Sarcopenia literally translates to 'loss of flesh'. Medically, it refers to gradual decline in muscle mass, strength and physical function with aging. While it is often overlooked, it is also the major reason for many fractures and hospitalizations of older adults, and sometimes, even death.
India is expected to have around 319 million people aged over 60 by 2050, which is one-fifth of the population. It could be concerning as they are at risk of sarcopenia. Studies have also shown that the number has increased from 8-18 per cent to 25-40 per cent adults, especially hospitalization cases. Experts point out that those with chronic diseases like diabetes are at a higher risk.
What Are The First Indian Guidelines On Muscle Loss or Sarcopenia?
Dr OP Sharma, who led guidelines said that muscle health is most important for healthy aging. "Strength preserves dignity. Early detection saves independence," he said. Dr Sharma also noted that the sedentary lifestyle, poor nutrition and chronic illnesses are accelerating this condition among seniors.
The guidelines also advise doctors to look for warning signs in patients, which include weak grip strength, slower walking speed, or difficulty getting up from a chair. There are also screening tools like SARC-F questionnaire, which could help identify those at risk.
The ray of hope here is that sarcopenia could be prevented or slowed that too with simple lifestyle changes.
What Lifestyle Changes Could Prevent Sarcopenia?
- Strength training exercises
- Adequate protein consumption
- Correcting deficiency including vitamin D and calcium
Doctors are also advising to eat a balanced diet, which includes protein, fats, green vegetables, and pulses. Dr Raju Vaishya of Indraprastha Apollo Hospitals said, "India is a sarcopenic nation". He pointed that everyone needs to be aware about muscle health, however this awareness remains low in the country.
Dr Randeep Guleria said the guidelines aim to brings muscle health into routine medical care. "They bridge science with clinical wisdom, making sarcopenia visible in everyday practice."
Can Just 10 Minutes of Exercise Reduce Depression?

Credit: Canva
A new Nature Human Behaviour (2026) study suggests that single-session psychological exercises lasting less than 10 minutes can lead to measurable decreases in depression symptoms even one month later.
Depression is one of the most common mental health disorders in the world. Every year, hundreds of millions of people suffer from depression, and many are unable to get therapy because of cost, stigma and the dearth of mental-health professionals.
Symptoms include excessive sadness, depression often includes fatigue, changes in appetite, sleep disturbances, difficulty concentrating and feelings of hopelessness. Treatment requires professional guidance for diagnosis and management.
A 10-Minute Intervention With Lasting Effects
Researchers conducted one of the largest randomized controlled trials testing short mental-health exercises and recruited 7,505 adults in the United States who were suffering from symptoms of depression and randomly assigned them to one of several short digital interventions or to a control group.All the brief interventions took less than 10 minutes to complete and were designed to teach practical coping skills that are commonly used in psychotherapy. Some exercises helped participants to reframe negative thoughts, while others focused on motivation, goal-setting or making sense of things by helping others. Participants completed surveys measuring their well-being immediately after the session and again one month later.
The results were striking: while many exercises boosted motivation and hope immediately, two interventions - Interactive Cognitive Reappraisal and Finding Focus - showed measurable reductions in depression symptoms even after a month. On average, participants experienced about a four percent greater reduction in depression scores compared with the control group.
Although the improvement may appear small, researchers note that brief, scalable interventions could reach millions of people who currently lack access to mental-health care as they can be completed in a few minutes and delivered online, these exercises may allow people to take initial steps toward better mental health, especially those waiting for professional help or unwilling to ask for help.
The scientists also stressed that these activities are not intended to substitute for therapy, but should be seen as readily available tools to help with emotional health.
Exercise and Mental Health: A Growing Body of Evidence
Previous research also shows that a quick burst of activity can make you feel better from other research too. A British Journal of Health Psychology 2024 study found that just 10 minutes of daily mindfulness practice significantly improved well-being and reduced symptoms of depression and anxiety among more than 1,200 participants from 91 countries.
Similarly, the US National Institutes of Health (2019) reviews suggest that the physical activity itself may help improve mood and depressive symptoms, strengthening the relationship between movement and mental health.
Collectively, these findings suggest that even small doses of mental or physical activity may lead to psychological benefits.
A Small Step That Can Make a Difference
Depression can make people feel trapped and out of control. The good news of the new research is that it suggests that big changes aren’t always necessary to move forward.
Sometimes, doing a small task, like spending 10 minutes learning a new coping skill or doing a quick mental exercise, is enough to change the way you think and gradually improve mood.
As researchers investigate these brief interventions, one thing is becoming clear: when it comes to mental health, few minutes matter more than we think.
Can Too Much Running Worsen PCOS? Gabby Logan Opens Up About Athlete Daughter’s Diagnosis

Credits: Instagram
British broadcaster Gabby Logan has revealed that her 20-year-old daughter Lois has been diagnosed with polycystic ovary syndrome (PCOS), a hormonal condition that may require her to step back from high-intensity endurance sport, including extreme long-distance running.
Speaking on her Mid-Point podcast, Logan said the diagnosis came after medical consultations about her daughter’s health and training. During the appointment, a specialist advised Lois to avoid “extreme running,” prompting mixed emotions in the family, concern about the condition, but also relief about scaling back punishing physical goals.
What PCOS Means for Athletes
PCOS is one of the most common endocrine disorders in women of reproductive age, affecting an estimated 8–13 per cent globally. It occurs when the body produces higher levels of androgens (male-type hormones) and often involves insulin resistance.
The condition can cause irregular periods, acne, excessive hair growth, weight changes and fertility challenges. Many patients also have difficulty regulating blood sugar, increasing long-term risks of type 2 diabetes and heart disease.
While exercise is widely recommended as a cornerstone of PCOS management, helping improve insulin sensitivity, metabolism and mood, specialists say the type and intensity of exercise matter.
Why Extreme Endurance Could Be A Problem
Doctors cautioned Lois against extreme endurance events such as half-marathons because prolonged, high-intensity training can significantly elevate cortisol, the body’s primary stress hormone.
In people with PCOS, hormonal balance is already fragile. Persistently high cortisol may:
- worsen insulin resistance
- disrupt ovulation further
- aggravate fatigue and inflammation
- intensify menstrual irregularities
In other words, although movement is beneficial, chronic physical stress can sometimes counteract the hormonal stability patients are trying to restore.
Moderate-intensity exercise, brisk walking, strength training and shorter runs, is generally considered more supportive for hormone regulation than sustained high-intensity endurance workloads.
From Half Marathon To Shorter Goals
Logan previously completed the London Landmarks Half-Marathon with Lois in 2024, describing the preparation as mentally and physically demanding. The pair had hoped to repeat the experience, but the new medical advice has changed those plans.
Instead, they now intend to focus on shorter runs together.
The television presenter admitted she felt a surprising sense of relief at the specialist’s recommendation, recalling how intense the training had been for both of them.
A sporting life continues — just differently
Lois, a competitive showjumper and university student, has long balanced academics with elite sport. She has ridden horses since childhood and competed at national levels, later even participating in a charity jockey race — an experience she described as “brutal.”
Her diagnosis does not end her athletic pursuits, but it reshapes them.
Medical experts increasingly stress that PCOS management is not about stopping exercise but tailoring it. Sustainable training, adequate recovery, and balanced nutrition often produce better long-term hormonal outcomes than relentless endurance performance.
For athletes with PCOS, the goal shifts from pushing physical limits to supporting physiological stability — a change that, doctors say, can ultimately protect both performance and health.
- Follow Us :


© 2024 Bennett, Coleman & Company Limited