- Health Conditions A-Z
- Health & Wellness
- Nutrition
- Fitness
- Health News
- Ayurveda
- Videos
- Medicine A-Z
- Parenting
Why Tai Chi Is More Effective Than Regular Aerobics For Lowering Blood Pressure
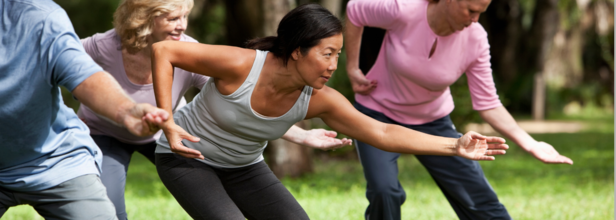
Image Credit: Canva
Tai chi stands for hard but not harsh, soft but not yielding. All the Tai chi movements are fluid and extremely Zero intensity, rather No intensity. Tai chi is like weaving silk, weaving a fabric with circular movements and moving with the air and directions.
Tai chi is like Yoga unison with cosmic energy, and has a calming and soothing effect on your autonomic nervous system. It relaxes your blood pressure, thus relaxing your heart. It improves deep slow rhythmic breathing too. Your heart, and all systems organs and functions become slow and rhythmic, getting you synchronized with your circadian rhythm.
Even while aerobic activity is good for the heart, people with hypertension may not want to engage in it because it might cause brief rise in blood pressure.
Good hormones can be momentarily elevated by intense aerobic activity, which can raise blood pressure both during and right after exercise. This can be dangerous for some people, particularly those who have high blood pressure or are not used to exercising.
While regular exercises are good for cardiovascular health and general fitness, they usually don't include this contemplative or focused element, which is why Tai Chi can be especially good for regulating blood pressure, especially for people who are stressed or anxious.
Lowering blood pressure is better with Tai Chi than regular aerobics for several reasons, they are:
1) Relaxation and slow movement
By promoting mental calmness, the practice lowers the stress reaction, which is essential for lowering blood pressure. Tai Chi counteracts the effects of stress and anxiety by producing a relaxation response and activating the parasympathetic nervous system through the integration of conscious breathing with the motions.
2) Improved Blood Flow
The gentle, flowing movements of tai chi contribute to better blood flow and circulation without being taxing. Over time, the controlled posture and slow motions can help lower blood pressure by increasing vascular flexibility.
3) Stress Hormones reduced
Tai Chi's deep breathing and awareness trigger the relaxation response, which lowers cortisol and adrenaline levels, two stress hormones. A long-term drop in blood pressure is facilitated by this decrease in stress chemicals.
4) Better for Elderly People or People with Health Concerns
Because tai chi is frequently seen as a low-impact workout, anyone with joint problems, balance disorders, or those who are elderly or fragile can participate. For people with high blood pressure who might not be able to handle the strain or effects of more intense cardio exercises, this makes it a safer option.
5) Mind-Body Connection
Tai Chi places a strong emphasis on the relationship between the mind and body, urging practitioners to pay attention to posture, breathing, and mental clarity as these factors have a direct impact on blood pressure regulation and general well-being. Tai Chi's meditative qualities aid in fostering inner peace and lowering emotional tension, two things that are crucial for controlling hypertension.
Tai- chi, de-stresses your mind, empties your negative emotions. So, pain, insecurity, hurt, resentments, and grudges get dissolved. Brings in The ultimate peace.
How to Build a Marathon-Ready Body Like a Pro Athlete, Runners Reveal

As marathon season commences across India, many runners have begun to warm up to set and beat their personal records. However, many also wonder: What does it take to get ready for a marathon?
According to Sanjana Rao, a Mumbai-based nutritionist who recently participated in the Tata Mumbai Marathon 2026, the first step to training well is to focus on efficiency.
Rao exclusively told Healthandme: "Running a marathon is not just about clocking miles, it’s about teaching the body to sustain effort efficiently. Having run the Tata Mumbai Marathon twice and worked with distance runners as a nutritionist, I have observed that endurance improves when training focuses on efficiency rather than exhaustion.
"Running volume should increase gradually, with one long run each week to build aerobic capacity. Easy runs form the foundation, while tempo runs and controlled speed sessions help runners sustain faster paces without early fatigue. Consistency matters more than intensity, especially for new runners."
"Endurance is not built by doing more, but by doing the right things consistently. When training and fueling align, runners feel lighter, stronger and better prepared for race day."
Which Exercises Can Help You Build A Marathon-Ready Body?
Cherry Aggarwal, a clinical nutritionist at Sir Ganga Ram Hospital tells Healthandme: "Runners should include structured and compound lower-body strength training exercises such as squats, lunges, step-ups, hip thrusts, and calf raises to improve muscular endurance, joint stability, and running efficiency.
"Single-leg exercises are particularly important as they help correct imbalances and reduce the risk of overuse injuries common in long-distance running. Building strong marathon legs goes beyond just clocking mileage, requiring a combination of smart strength training, progressive running, and targeted nutrition."
And Rao agrees, citing that strength training that focuses on improving full-body movement and power, rather than increasing muscle size should be prioritized while getting ready for a marathon.
She told the publication: "Strength training is often misunderstood in endurance preparation. Many runners rely heavily on heavy back squats and leg presses. While effective for general strength, these lifts can promote quad and adductor hypertrophy, making the legs feel bulky and reducing running economy.
"For marathon runners, strength work should support movement quality and power transfer, not muscle size."
Talking about how long runners should be working out, Rao revealed: "Most runners benefit from at least one complete rest day each week, with 24–48 hours between hard or long runs. In the final week before race day, reducing training volume allows muscles to repair, glycogen stores to replenish and the nervous system to reset."
What Should You Eat To Build Running Stamina?
Both Rao and Aggarwal note that eating well is as important as building strength in the gym. Without proper fuel and hydration, the body as well as the mind begin to experience fatigue and disarray which paves the way for serious injuries mid-run.Rao explained: "A less known yet crucial factor for new runners is gut training. Many runners experience fatigue or discomfort during long runs not because their legs fail, but because the digestive system struggles to absorb fuel while in motion. Like muscles, the gut adapts with repeated exposure.
"Practicing carbohydrate intake during long training runs through sports drinks, bananas or gels helps the intestine improve glucose absorption under stress, which improves sustained energy output. Hydration and electrolytes are critical in India’s hot and humid conditions to prevent cramps and premature fatigue.
Talking about the exact foods you should be eating, Aggarwal said: "From a nutrition standpoint, adequate carbohydrate intake is essential to maintain glycogen stores for long runs as it is the primary fuel, while sufficient protein supports muscle repair and recovery. Iron-rich foods play a crucial role in oxygen transport and endurance capacity, especially for regular runners.
"Foods like whole grains, bananas, potatoes, lentils, lean meats or paneer, nuts, seeds, and leafy greens play a key role. Including healthy fats like omega-3s can help manage inflammation from repetitive impact, while calcium and vitamin D support bone health.
"Hydration and electrolytes are often overlooked but are critical for muscle contraction and preventing cramps. Consistent training, nutritional recovery and sleep together determines how well the marathon legs perform on race day.”
What Could The Cracking Of Your Joints And Knuckles Mean?
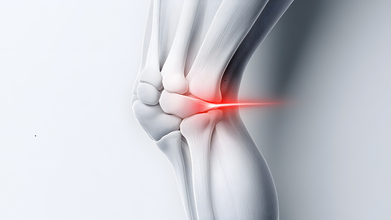
Credits: Canva
If your knees crack when you stand up or your back lets out a dramatic pop during a morning stretch, you’re definitely not alone. These sounds, medically known as crepitus, are incredibly common. For most people, they are harmless and simply part of how the body moves. Still, those noises can be unsettling, especially when they happen often. So what’s really going on inside your joints, and how do you know when it’s time to pay attention?
Joints are where two bones meet, allowing movement and flexibility. As they move, it’s normal for them to make sounds. Most of the time, these noises are nothing to worry about. But in some cases, they can signal wear and tear or an underlying issue that deserves a closer look.
What Causes Joints to Crack and Pop?
There isn’t just one reason joints make noise. Several everyday processes inside the body can create pops, clicks, or cracks.
Gas bubbles in joint fluid
One of the most common causes is gas escaping from synovial fluid, the liquid that lubricates your joints. This fluid contains gases like oxygen and carbon dioxide. When you move suddenly, tiny gas bubbles can form and collapse, creating a popping sound. This is completely normal and does not damage the joint.
Tendons and ligaments shifting
Tendons and ligaments help stabilize joints. Sometimes, they slide over a bone and snap back into place during movement. This can cause clicking or popping, especially in the knees, shoulders, and ankles. It’s often noticed during exercise or when you change positions quickly.
Cartilage wear over time
Cartilage cushions the ends of bones and prevents friction. With age, overuse, or repetitive strain, cartilage can thin out. When that happens, joint surfaces may rub more than usual, leading to grinding or grating sounds. This can be an early sign of osteoarthritis, especially if discomfort is also present.
Tight muscles and limited flexibility
After long periods of sitting or intense workouts, muscles and tendons can tighten. As they move over bones, they may create soft snapping or clicking sounds. This is common in people with sedentary routines or those who repeat the same movements daily.
When Should Joint Noises Raise Concern?
Most cracking and popping is harmless, but certain signs suggest it’s time to be cautious.
Pain, swelling, or warmth around a joint may point to inflammation, ligament injury, or arthritis. A sudden loud crack followed by pain or instability could indicate a tear, particularly in the knee. If popping is paired with stiffness or locking, it may be related to meniscus problems or other structural issues. Joint noises that begin after an injury, such as a fall or sports impact, should always be evaluated.
Does Cracking Joints Cause Arthritis?
Despite what many people were told growing up, cracking your knuckles does not cause arthritis. Research has found no direct link between joint cracking and arthritis development. While excessive cracking might cause mild swelling or temporary discomfort, it does not damage the joints or lead to arthritis.
How to Reduce Joint Popping?
If joint noises bother you, small lifestyle changes can help. Regular movement keeps joints flexible and well-lubricated. Stretching tight muscles and strengthening the muscles around joints can reduce strain. Maintaining a healthy weight lowers pressure on knees and hips. Proper warm-ups, hydration, and a nutrient-rich diet also support joint health.
When To See A Doctor?
Joint sounds alone are usually harmless. But if they come with pain, swelling, stiffness, or reduced movement, it’s wise to consult a healthcare professional. Early evaluation can prevent further damage and help you stay mobile and comfortable in the long run.
7 Standing Exercises To Build A Stronger Core, Better Balance And Control
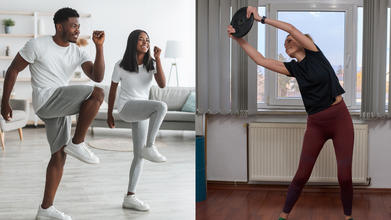
(Credit-Canva)
When it comes to building a strong core, most of us think about exercises like crunches, or sit ups. But there is a lot more to core strength than that. One of the main aspects of core strength is stability and balance. While the floor exercises are helpful, they strain your neck muscles, so what can one do?
You can build a powerful, stable midsection entirely on your feet. Standing core workouts are often more "functional" than traditional crunches because they mimic how your body actually moves in daily life, twisting, carrying, and resisting gravity.
7 Standing Exercises For Strong Core
These are some exercises you can try. They will not only help you build strong core muscles but also build your coordination and balance.
Standing Bicycle Crunches
This move is a fantastic way to wake up your entire abdominal wall. By bringing your opposite knee and elbow together in front of your body, you force your obliques to rotate and your front abs to crunch while standing. It also challenges your brain and balance as you switch from leg to leg. Focus on bringing the knee high rather than just pulling your neck down.
High-Intensity High Knees
This move brings a cardio element to your core training. By quickly driving your knees toward your chest, you engage the lower abdominals and hip flexors. It requires a lot of energy and keeps your heart rate high while forcing your abs to stabilize your upright torso. If the jumping is too much, you can perform it as a slow, powerful march instead.
Standing Dumbbell Side Crunch
Think of this as a side-bend with a purpose. By holding a weight in one hand and leaning toward it, you stretch the opposite side of your waist. The real work happens when you use those side muscles to pull your body back to a perfectly straight, upright position. It is one of the best ways to build lateral strength and define the sides of your torso.
Cable or Band Wood Chop
The wood chop mimics the diagonal motion of swinging an axe, which is a powerful, functional movement. It trains your core to handle rotational force, which is essential for sports like golf or tennis. As you pull the weight across your body, keep your hips stable and let your midsection drive the motion. This builds a core that is both strong and incredibly mobile.
Offset Marching
Holding a weight in one hand while marching forces your body to stabilize against an uneven load. Every time you lift a knee, your core has to fire to prevent you from wobbling or tipping toward the weighted side. This exercise is excellent for improving balance and strengthening the deep "hidden" muscles of the belly that keep your hips and lower back healthy.
The Pallof Press
This is an "anti-rotation" exercise, meaning the goal is to resist movement rather than create it. As you press a cable or band away from your chest, the tension tries to pull you sideways. Your core must stay tight to keep your hands centered. It is a subtle but intense burner that builds incredible stability in the deep abdominal layers and the obliques.
Heavy Suitcase Carry
This exercise is as simple as it is effective. By carrying a heavy weight on just one side, your core must work constantly to keep you from leaning over. This "anti-leaning" action recruits the deep muscles that protect your spine and improve your posture. Imagine there is a string pulling the top of your head toward the ceiling as you take steady, controlled steps.
- Follow Us :


© 2024 Bennett, Coleman & Company Limited